| Card Interface
|
|
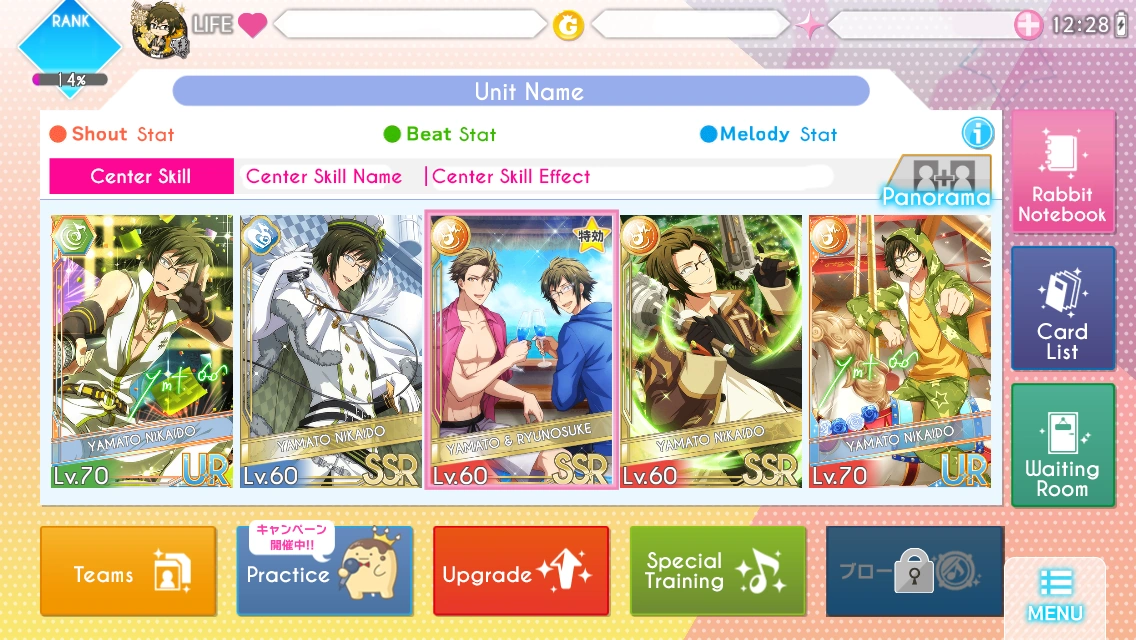
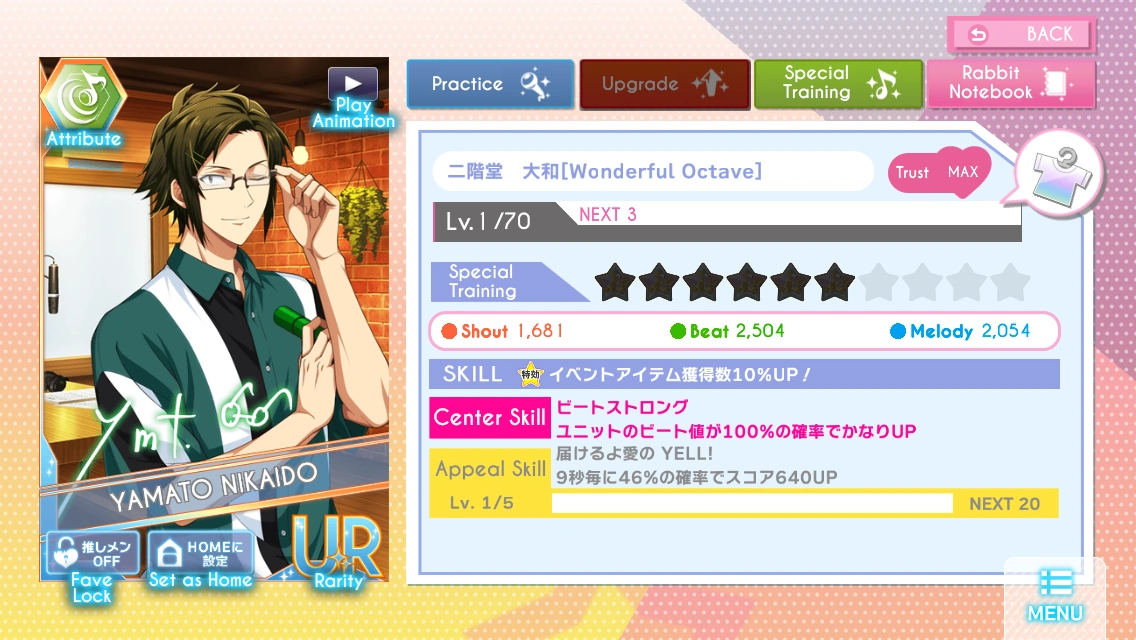
This is the standard card info image, which you can reach by selecting cards.
- To select a card, hold the card at any point in the Member button. Can be from the Card List, Waiting Room, Selecting Teams, etc.
The Practice, Upgrade, Special Training, and Rabbit Notebook buttons at the top will let you be able to do those actions to the card you are viewing. View those sections of the guide on what to do in said section and what they are for.
- These buttons cannot be pressed if you're viewing the card in the Waiting Room. Move the card to the Card List if you want to do any of these actions to get the card. More information on that is in the Waiting Room section of this guide.
|
| Animation
|
|
When you scout a card that has an animation, like the Wonderful Octave set, it will play an animation when the card shows up on the gacha screen.
This is the animation for Yamato's Wonderful Octave UR.
It's .gif file, but currently there is no animation.
You can replay this animation by pressing this button. Do note that not all cards have an animation when you gacha for them.
|
- When you press the button, a pop up will show up saying something along the lines of "Would you like to view the animation of this card?"
- Blue Button means no.
- Pink Button means yes.
- If pink button is pressed, you will be prompted with a "would you like to download this animation" screen.
- Blue Button means no.
- Pink Button means yes.
- It will then play the animation if pink button is pressed.
- If you tap the screen while the animation is playing, a pop up saying "would you like to exit this animation?"
- Blue Button means no.
- Pink Button means yes.
You can play this animation as many times as you want.
|
| Fave Lock
|
|
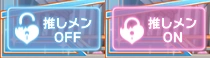
推しメン, or Favorite (Fave for short), lock is simply a button that lets you lock cards so that you don’t accidentally practice/sell/upgrade- in other words, so you don't accidentally get rid of them.
- An unlocked card will show a blue button with an open lock.
- A card that is locked will have a pink button, with the lock closed.
|
| Set as Home Screen
|
|
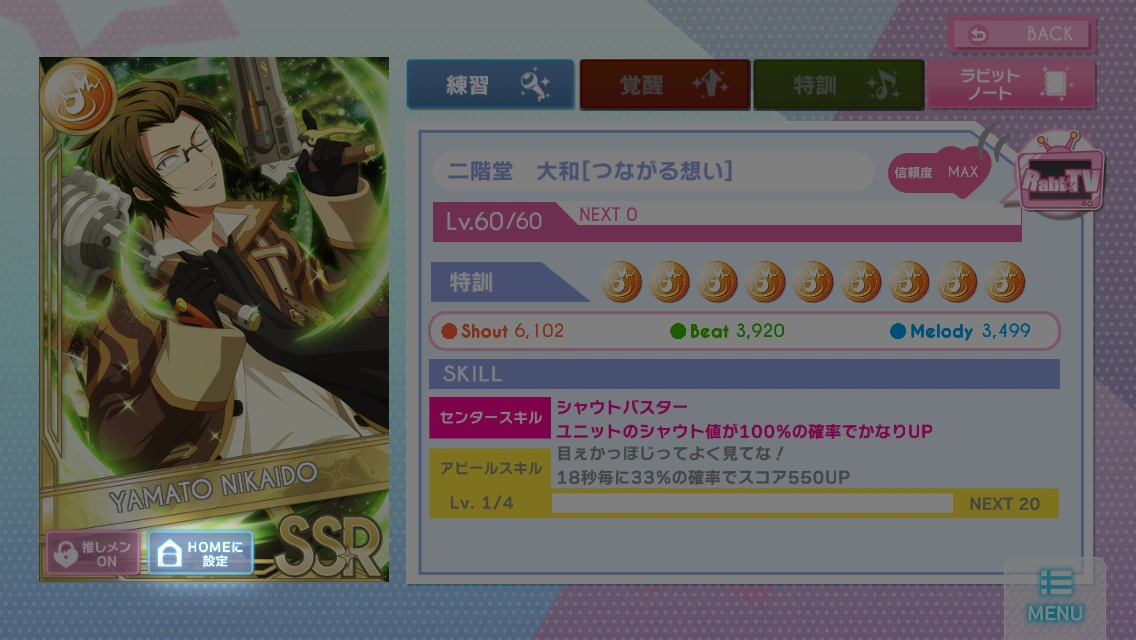
By default, the Card on your Home Screen is the center of your Main Team, however you can change the Card on your Home Screen without changing the Center of your Main Team by pressing this button.
|
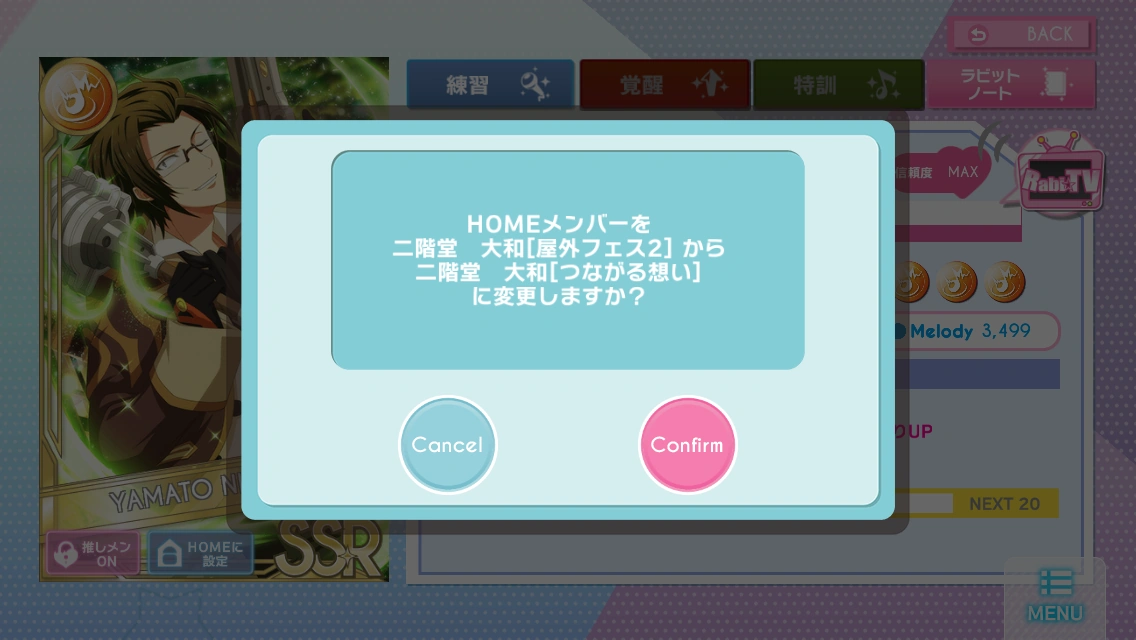
- Press the Set as Home button (HOMEに設定)
|
- A Pop-up will show up saying that the card on your Home Screen is going to be changed.
- Blue button will Cancel the process and the Pink Button will Confirm your action.
|
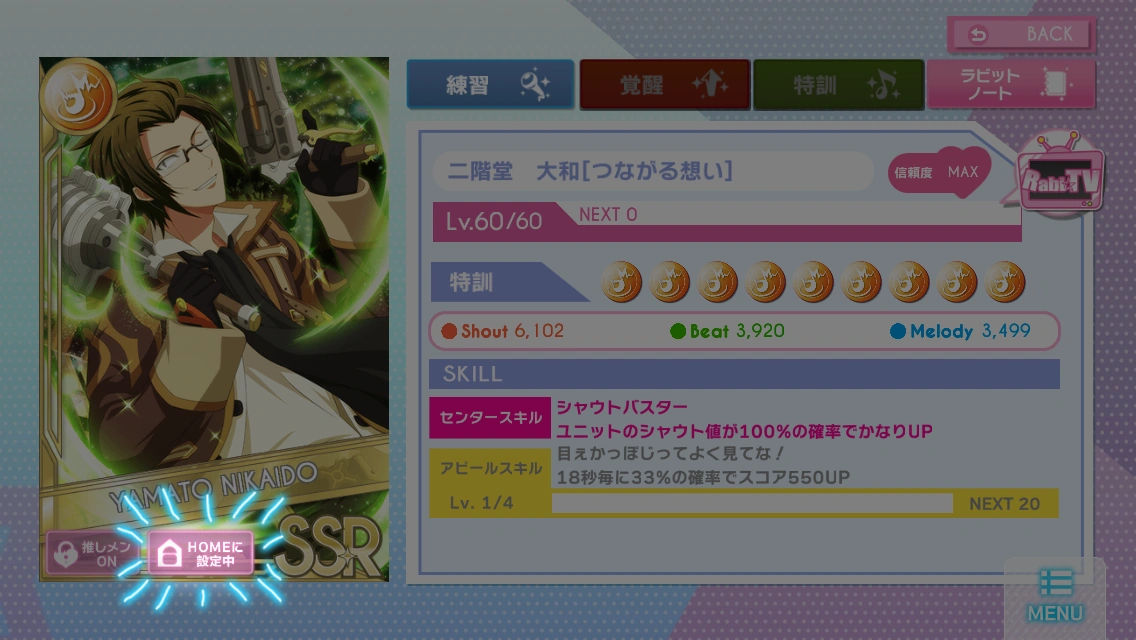
- The Set as Home button will now be in pink until you press it again or do the same thing with a different card which it will go back to being blue.
|
| Rarity
|
|
IDOLiSH7 has 5 rarities. In general order from weakest to strongest, they are:
Normal (N) → Rare (R) → Star Rare (SR) → Super Star Rare (SSR) → Ultra Rare (UR)
IDOLiSH7 allows cards to be upgraded from one rarity into the next. To do this, look at the Upgrading part of this guide. Do note that not all cards can be upgraded to a higher rarity. The rarity of the card also determines various aspects relating to level and training, which will be detailed in other collapsibles.
|
|
| Trust (commonly called Affection)
|
|
Cards naturally gather affection (heart points) every time you use them in a live.
- Center will receive two(2) points for every live completed
- Cards that aren't your Center will receive one(1)
- These numbers do not include the effects of badges/campaigns.
Affection doesn’t do anything to effect the stats; rather, raising affection allows you to unlock Rabbit Chats/TV.
- Rabbit Chats are text messages between Tsumugi and the idol for that card.
- Rabbit TVs are behind the scenes look at the idols of the card.
- These usually deal with the scenario or background of the card, and also offer a lot of insight to the character and their relationship with others outside of the realm of the main story. More on those in the Rabbit Chat/TV section of this guide.
- If the card doesn't have a Rabbit Chat/TV, this feature basically does nothing and is kinda useless.
A card with 100% affection will give you the reading of MAX on that card's heart- as it is at max affection. Otherwise, you will see a number percentage on the heart as shown above.
|
| Rabbit Chats / Rabbit TV / Puchinana
|
|
What you see here depends on what kind of feature your card has. There's four type of feature a card can have, Rabbit Chats, Rabbit TV, Puchinana, and Brooch Skill.
Selecting any of these icons will give you that interface, a guide for each interface can be found below. Brooch Skills are very different from these so, those will be covered in another section of the guide.
|
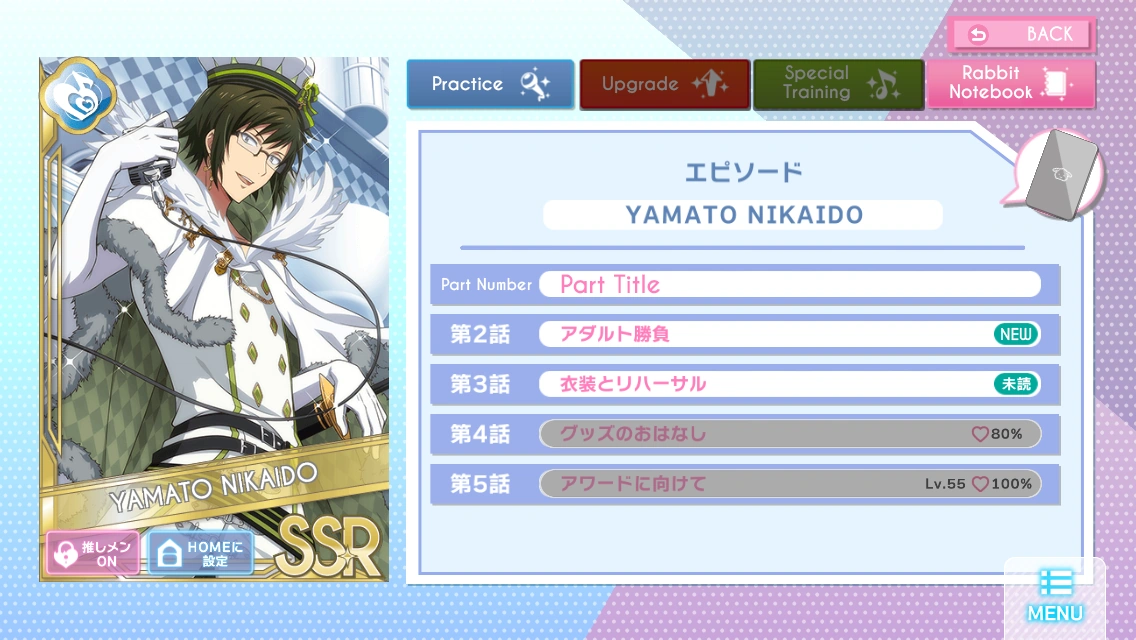
Rabbit Chats 
|
|
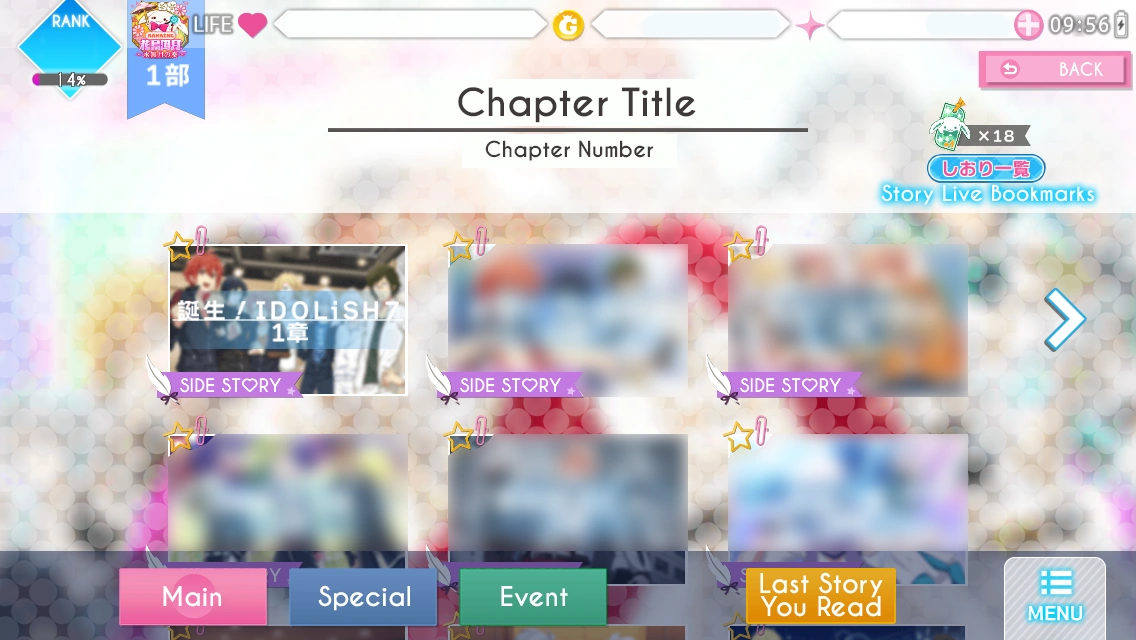
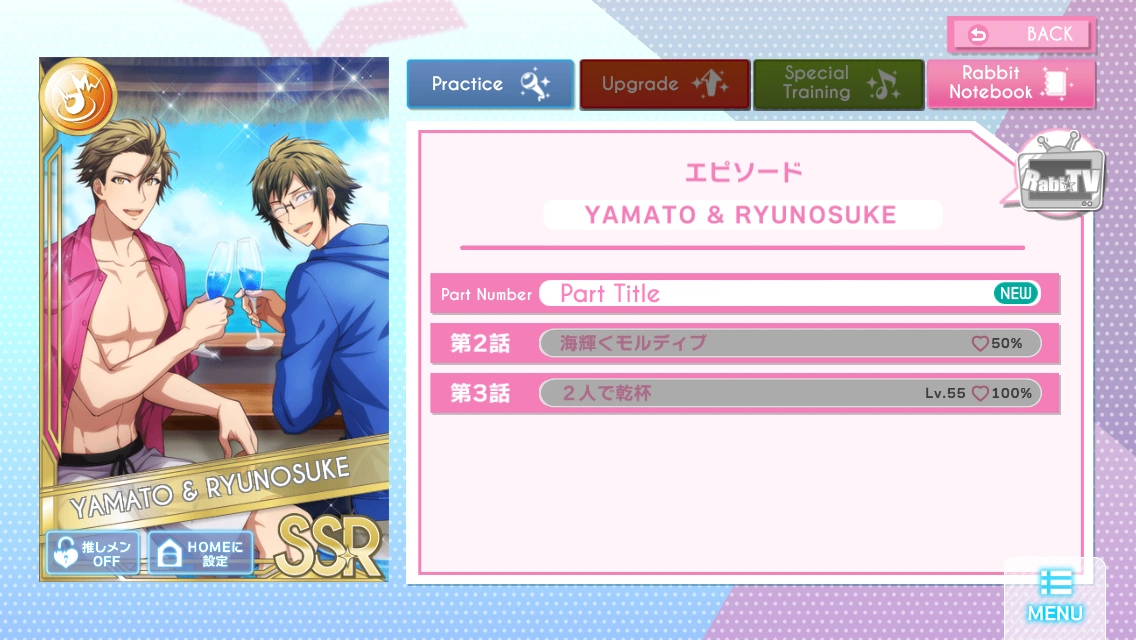
In order to view a chat, press anywhere on that chat's part title.
- Chats not greyed out have been unlocked.
- Chats with a Green Mark on the right side mean that chat hasn't been read yet.
- Chats greyed out haven't been unlocked yet as that card hasn't met the requirements to unlocking it yet.
- Requirement in order to unlock a Chat are the following;
- Unlocked at 5% affection
- Unlocked at 20% affection
- Unlocked at 40% affection
- Unlocked at 80% affection
- Unlocked at both 100% affection and Level 55
Some cards, may have a slightly different requirements in order to unlock them. However these are the usual conditions.
|
| Within Rabbit Chat Interface
|
|
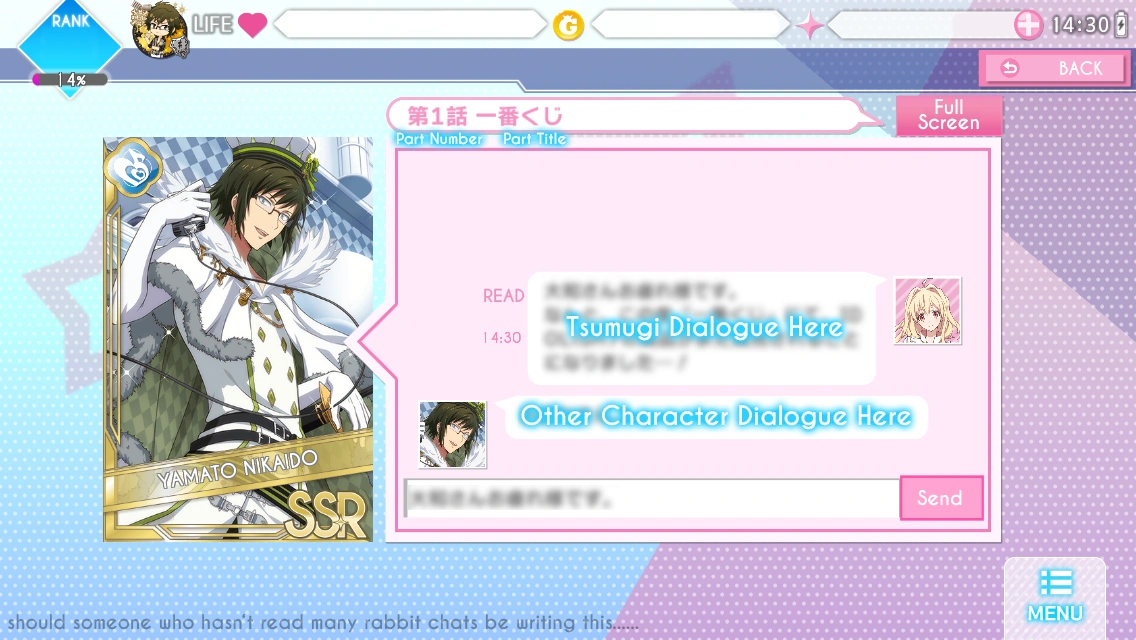
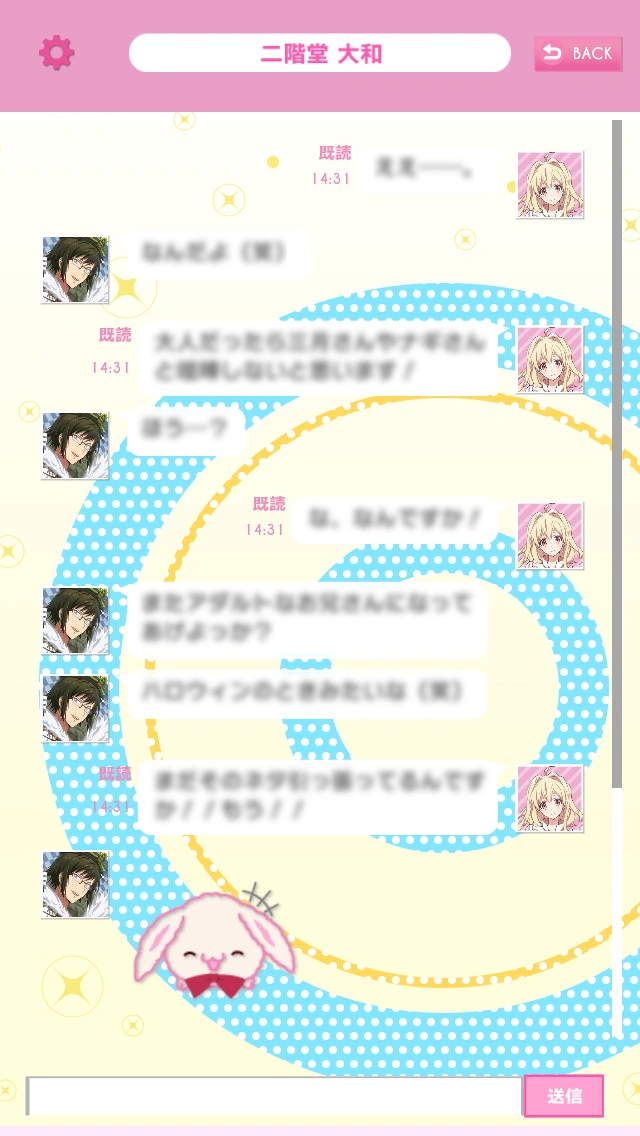
Once you picked a chat to view, you'll see a screen like this.
- In order to start a chat, you'll have to press the Send (送信) button.
|
|
Pressing the Full Screen button at the top will let you view the chat vertically, as if you were actually texting the character.
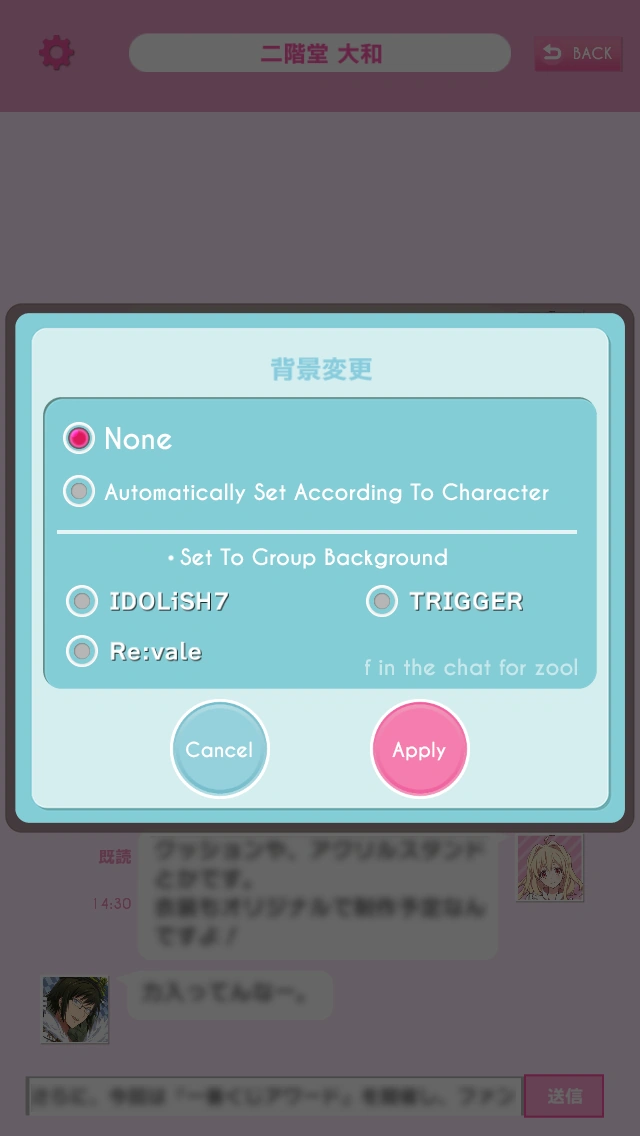
Pressing the Gear at the top, will allow you to change the background of the chat.
Pressing Back will bring the chat back to the first screen before you full screened.
|
| Rabbit Chat Background
|
|
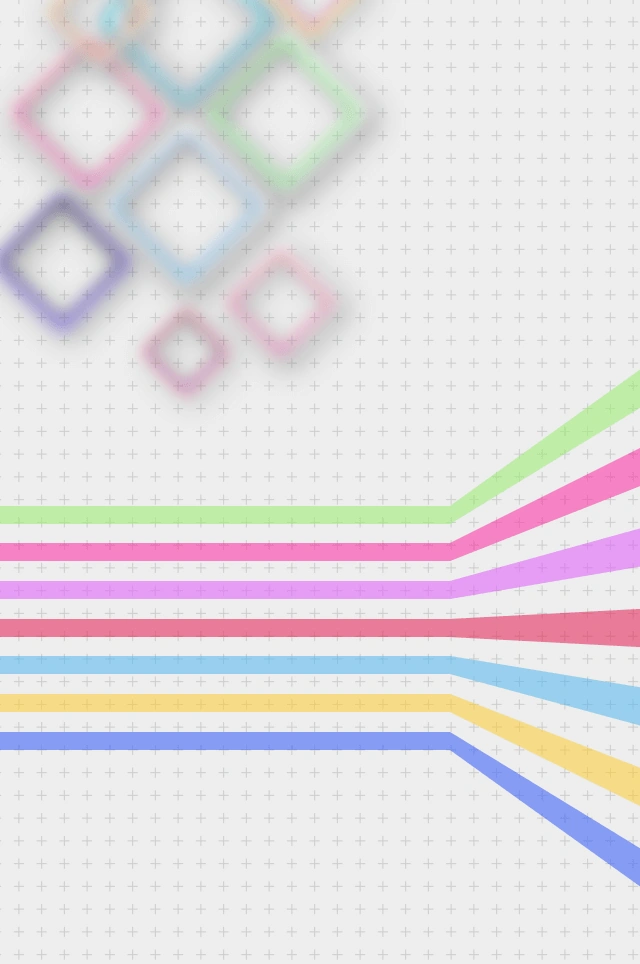
These images weren't ripped out of the game, however they are screenshots from it. Feel free to use them however you wish, wiki credit isn't needed. Also, if you were wondering- the color for Tsumugi's wallpaper is #ffeafa.
How to Properly Download These Images: Click the image you want and you will get a zoom of the image. If you hover against the image, borders on the top and bottom will appear. On the top border you will see the file name of the image- right next to that has some text that says See full size image. Click that. That will open the image in that tab, so you might want to open it in another tab by right clicking and clicking open in a new tab. If you stare at the URL of the image, you will get something like the following
https://vignette.wikia.nocookie.net/idolish7/images/d/de/Image_File_Name_Here.png
/revision/latest?cb=SomeNumbersHere
Delete everything on the URL after revision to make it something like
https://vignette.wikia.nocookie.net/idolish7/images/d/de/Image_File_Name_Here.png
That's your image. This is the part where it's OK to save the image.
|
|
|
| Rabbit TVs
|
|
In order to view a channel, press anywhere on that channel's part title.
- Channels not greyed out have been unlocked.
- Channels with a Green Mark on the right side mean that chat hasn't been read yet.
- Channels greyed out haven't been unlocked yet as that card hasn't met the requirements to unlocking it yet.
- Requirement in order to unlock a Channel are the following;
- Unlocked at 15% affection
- Unlocked at 50% affection
- Unlocked at 100% affection and Level 55
Some cards, may have a slightly different requirements in order to unlock them. However these are the usual conditions.
|
| Within Rabbit TV Interface
|
|
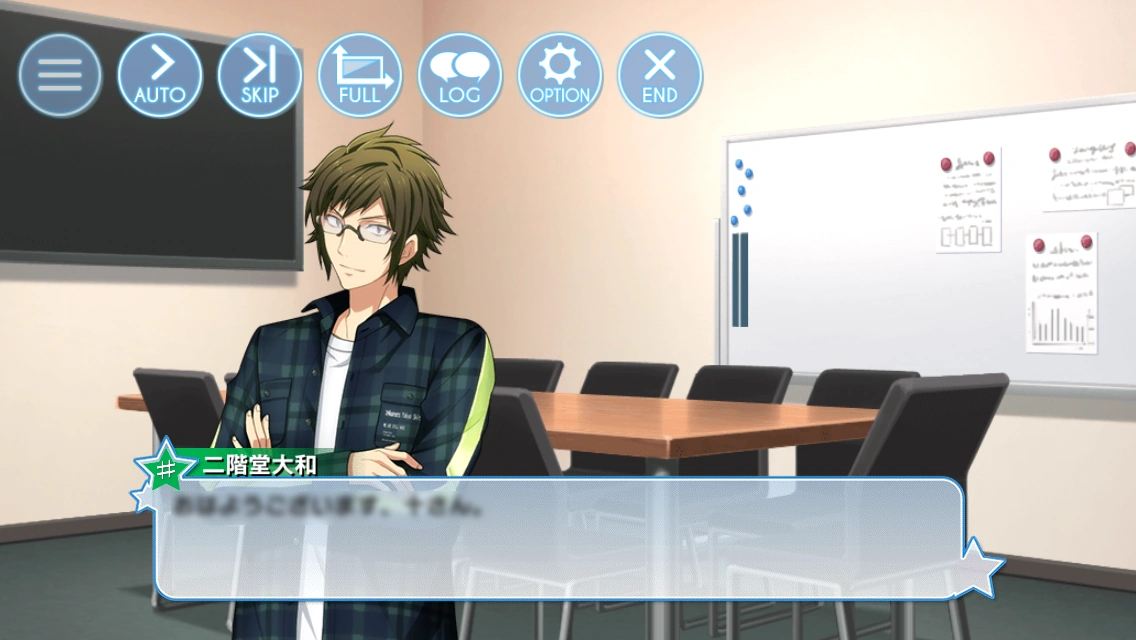
Once you picked a channel to view, you'll see a screen like this. This is the exact same UI used for when you're viewing stories.
- Auto: the Rabbit TV will play automatically, without you having to tap the screen to progress.
- Skip: Will allow you to skip through the channel.
- Full: Allows you to see the screen without the dialogue box at the bottom
- Log: Allows you to see past dialogues you've passed
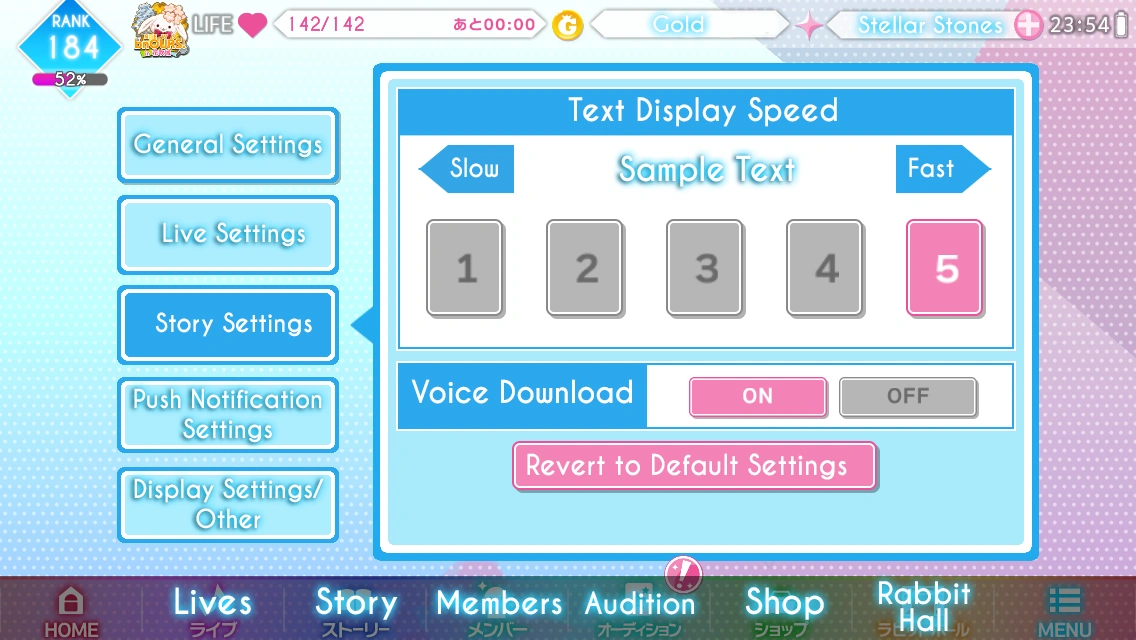
- Options: Story options. Allows you to change the volume of the Background Music and Voices if there are any present. Below that is the text speed, one(1) being the slowest and five(5) being the fastest. The default is three(3).
- End: Will immediately end the channel. Pressing this will still be considered as clearing the channel.
On the last channel of some Rabbit TVs, there may be a horizontal CG of the card. Do note that not all Rabbit TVs will have a CG in them.
|
|
| Puchinanas
|
|
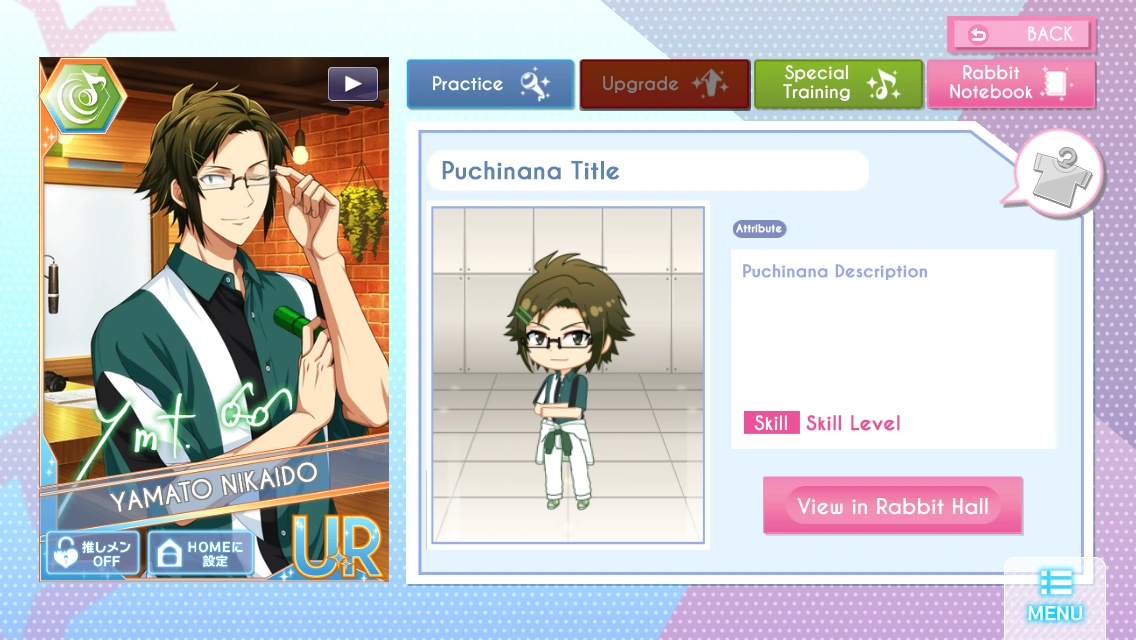
Here you can view the Puchinana of the card! Do note, that pressing this will only show the Puchinana attached to the card.
- You can view the Title, Attribute, Description, and Skill Level of the Puchinana here
- What the Puchinana's Attribute and Skill Level do is still unknown.
Pressing the View in Rabbit Hall button will allow you to view the Puchinana in the Rabbit Hall interface. Which, is covered in detail in the Rabbit Hall section of this guide. Which can't be written because Rabbit Hall keeps crashing my phone.
|
|
| Level
|
|
All cards (obviously) start at Level 1, but the Max Level is determined by the card’s rarity.
- N: 30
- R: 40
- SR: 50
- SSR: 60
- UR: 70
The easiest way to strengthen your cards is by increasing the level. Gathering experience points to level your cards can be done in two ways.
- The first is to simply put your card in a live. Cards acquire a fixed number of experience points per live based on the difficulty and your score grade.
- The second is by Practicing your cards away, which requires extra cards you don’t need, and the gold necessary to feed them. You view more information on Practicing in the Practicing tab.
|
| Card Stats
|
|
These numbers are used to help build teams, and are especially important during High Score Events (when ranking is based on cumulative high score). Though a card can only be one attribute, the stats are spread out through all three attributes. The stat matching the attribute of the card is usually the strongest without special training, and definitely will be the strongest with special training.
|
|
These stats are additive, so to figure out the stats of your team all you need to do is add all the Shout stats, all the Beat stats, and all the Melody stats to get your three numbers. As attributes change in lives (indicated via the background changing colors), the game will switch to using the appropriate attribute stat to calculate your score (using some kind of magic math formula nobody's figured out yet / no one has shared with the class yet).
|
| Special Training
|
|
The bane of most players' existence, but hands down the most important way to strengthen your cards. A more in-depth guide on Special Training can be found in the Special Training collapsible, but here are the basics.
- Special training only increases the stat matching your card's attribute. So putting a Shout card through special training will only increase the Shout stat of the card.
- If you want Character Tokens, you can do lessons on any of the attribute days. Even if you use a Shout center on Beat Lesson Day, your character tokens will still drop. Only Character Tokens of your Center will drop.
- Easiest way to get Character Tokens are from Events that have a Clearing House. Where you have to exchange items you get from the Event Songs to get whatever item you need. You can pick what you exchange for.
- If you want Attribute Tokens, you must do lessons during the appropriate lesson day. Even if you have a Shout center on a Beat Lesson Day, only Beat attribute tokens will drop.
- Easiest way to get Attribute Tokens are from Events that have a Clearing House. Where you have to exchange items you get from the Event Songs to get whatever item you need. You can pick what you exchange for.
- If you care about High Stats or i7 Meta, you probably only want to Special Train any Pure SSR / Any UR cards you get because those are usually really strong.
- Most cards increase by 200 points in their matching attribute for every special training slot filled. URs increase by 250 points.
- Special Training requires gold. If you don’t have enough, you cannot special train.
|
|
As you train a card, the slots in this area will fill up.
- Slots that are filled with the attribute symbol have been trained
- Slots that have a greyed out attribute symbols can still be trained
- If there are any blank spots, that means you can't special train to get those at all.
|
|
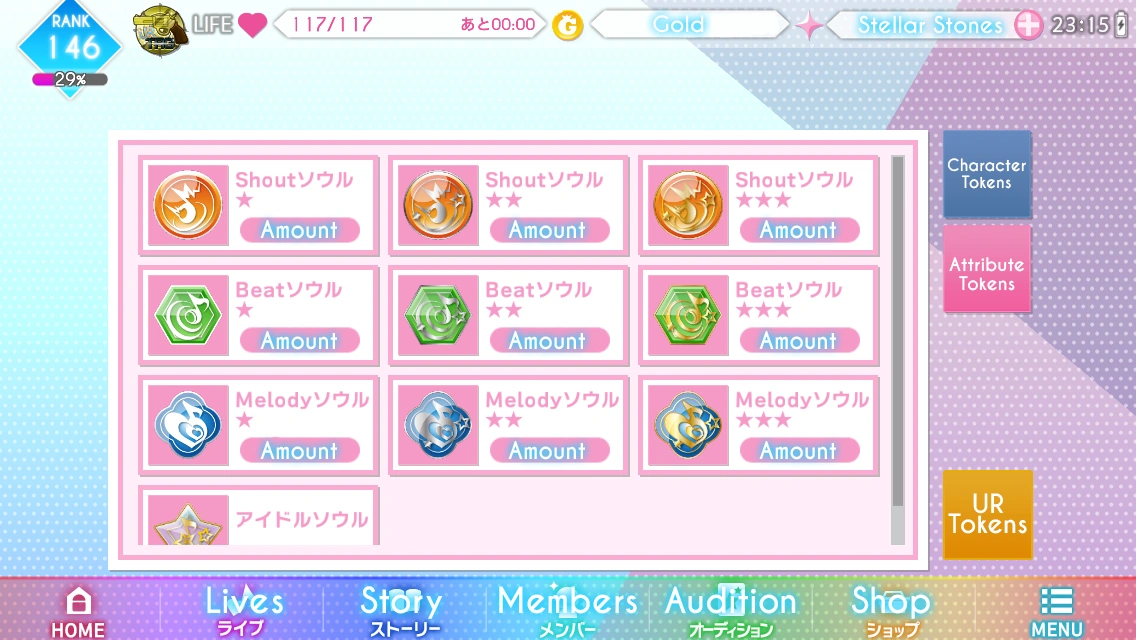
All cards N through SSR use their attribute tokens plus their character tokens in special training. UR cards, however, use another item, Idol Souls. Currently these are only given out in events.
10 of them are required for each special training slot in addition to the usual number of other tokens. Since URs have 6 slots, this means that to fully special train a UR, you need
- Attribute Souls: 54 1* Souls, 30 2* Souls, 6 3* Souls
- Character Tokens: 30 Bronze Tokens, 19 Silver Tokens, 12 Gold Tokens
- Idol Souls: 60 Idol Souls
|
| Efficacy
|
|
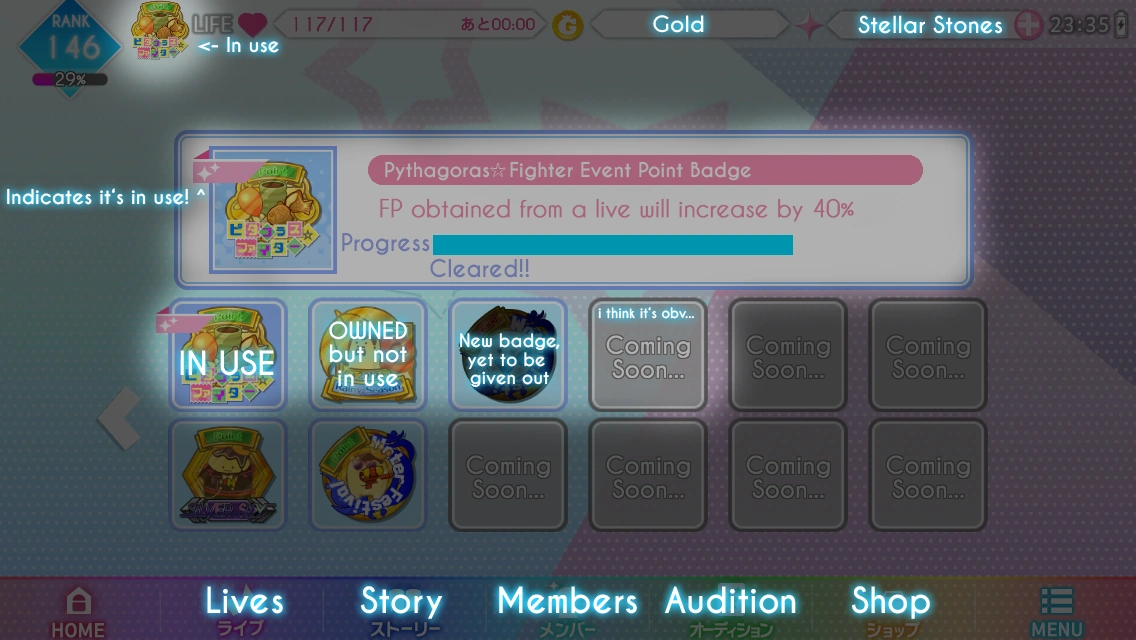
This message shows up on certain cards only during events. If a gacha and event happen at the same time, odds are the cards added to the gacha will be helpful in some way during the event.
|
|
Cards with Efficacy always have the details written here, and you can assume that they will give some kind of boost to the event. Score, Items, Points, etc.
|
| Center Skills
|
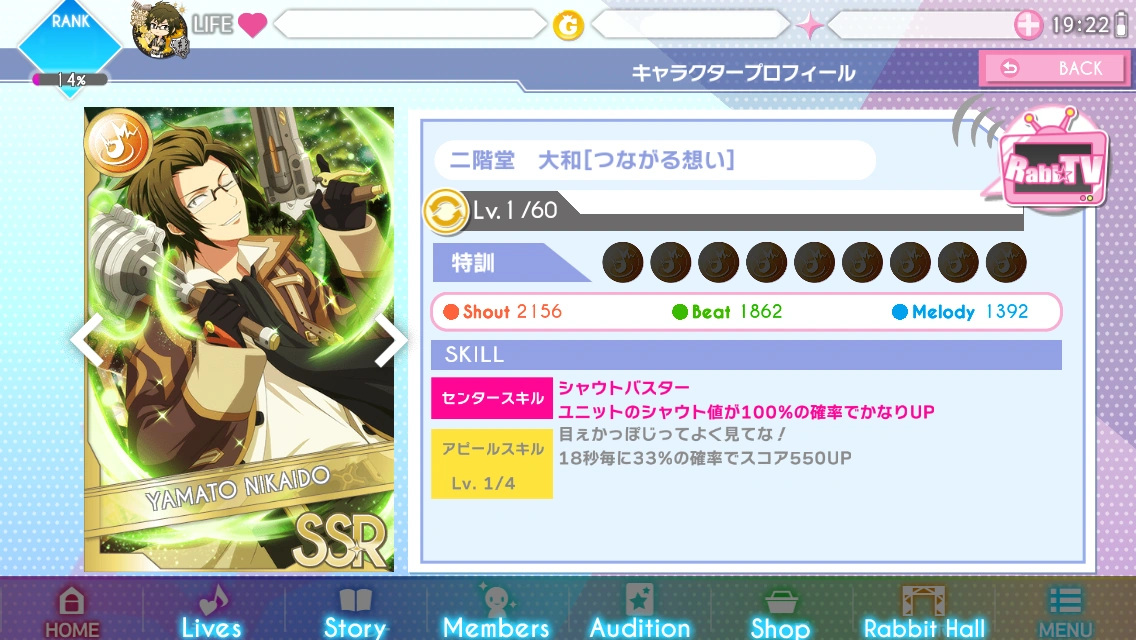
|
Center Skills have a chance of activating at the beginning of each live. As the title implies, only the center of your team (plus your support) will have a chance at activating these skills, so it’s important to place the card with the strongest Center Skill at the center of your team.
|
|
Center Skills all focus on giving a boost to the matching attribute of your center card. Putting a Shout card in the center will potentially give a boost to your Shout stats, and only your Shout stats. The various skills were introduced in waves, but the important things to look for are the percent and the scale word.
- The percentage indicates the chance it has of activating. If your center flashes on your screen before the notes start streaming, congrats! Your Center Skill has activated.
- The scale word indicates how powerful this boost is, usually in the form of [word]UP. Usually, cards with a 100% chance of activating also tend to have the strongest scale word, but in order from least to most strong, these words are the following.
If you want to find out the Center Skill of a card, you can find it on that card's page!
|
| Appeal Skills
|
|
Appeal Skills activate periodically throughout the live; this is what's happening when the cards flash on the upper side of screen. If you want to find out the Appeal Skill of a card, you can find it on that card's page! Anyways, they come in four broad categories.
- Lockers
- Lockers are cards that, for a fixed period of time, change certain notes to Perfects. There are two kinds of Lockers.
- One where it turns Bads and Goods into Perfects, these are indicated with a blue timer during lives.
- And another where it turns Misses, Bads and Good into Perfects, these are indicated with a purple/magenta timer during lives.
- Score Up
- Score Up cards increase your base score for one tap after certain conditions are met. The score will go up in the next available note you tap, and only on that note.
- Guard
- These have a chance of activating at the beginning of a live and give you a fixed number of chances to turn Misses into Good or Perfects.
- Exchange
- Exchange cards come in two varieties.
- One where the judgement area / hit box increases in exchange for decreasing your score
- And another where the judgement area / hit box decreases in exchange for increasing your score
|
|
All of these Appeal Skills have skill levels that you can increase. Max level for a Skill Level depends on the rarity.
- N and Rs straight up don't have Appeal Skills
- SRs Max Appeal Skill Level is 3
- SSRs Max Appeal Skill Level is 4
- URs Max Appeal Skill Level is 5
You can raise the Appeal Skill level by doing any of the following ways.
- Upgrading a card. The skill level of any card above SR that's been Upgraded automatically puts the resulting card at Skill Level 2.
- Practicing identical cards together. These give a fixed amount of experience based on the card's rarity.
- Using the SSR King Pudding that looks like a statue. These are really hard to come by, usually obtained via ranking in events.
|
| Brooch Skills
|
|
Idol Brooch is a card-exclusive skill that act similar to the Center/Appeal Skills. Currently, there are two conditions in which these skills activate.
- If said card activates its Appeal Skill during a live of a particular song, the effect of this card's Brooch will activate
- If said card is put in the same team as cards of the same character and the same element, the effect of this card's Brooch will activate
|
|
Card Sets that have Brooch Skills are the following. Last updated: August 26, 2019.
|
| Other Card Views
|
|
There are plenty of other places and ways to see your cards, and they all have various bits of information as well
|
| The Card Gallery
|
|
The Card Gallery at a glance allows you to see all the cards in the game.
- If the cards are colored, that means you personally own them now or have owned them at some point.
- If the cards are greyed out, that means you don't own them and have used them at one point in time as a Support Card for a live.
- A blank slot means you haven't found that card yet or there's nothing there.
|
|
By choosing a card from the card gallery, you get a similar screen to the one you get by going to your card collection.
|
|
All cards in the card gallery default to showing their base stats at Level 1. However, if you have a card completely leveled up and completely trained, you can press the arrow button right next to the level to show the card's max stats.
This option is only available on cards you have previously maxed out; the button is otherwise greyed out.
|
| Members Tab
|
|
When you go to your members tab, you see your Main Unit first.
|
|
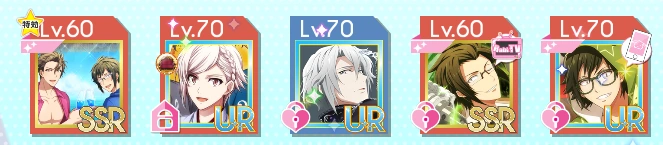
You’re also given some basic information about your cards on this screen:
- Efficacy (the flashing star)
- Card Attribute (the colored banner)
- Card Level
- Card Rarity
- If it's Fully Special Trained or not
- A little less obvious than the others, but if you fully special train a card, the border will change into a much fancier border!
|
|
|
|
| Teams
|
|
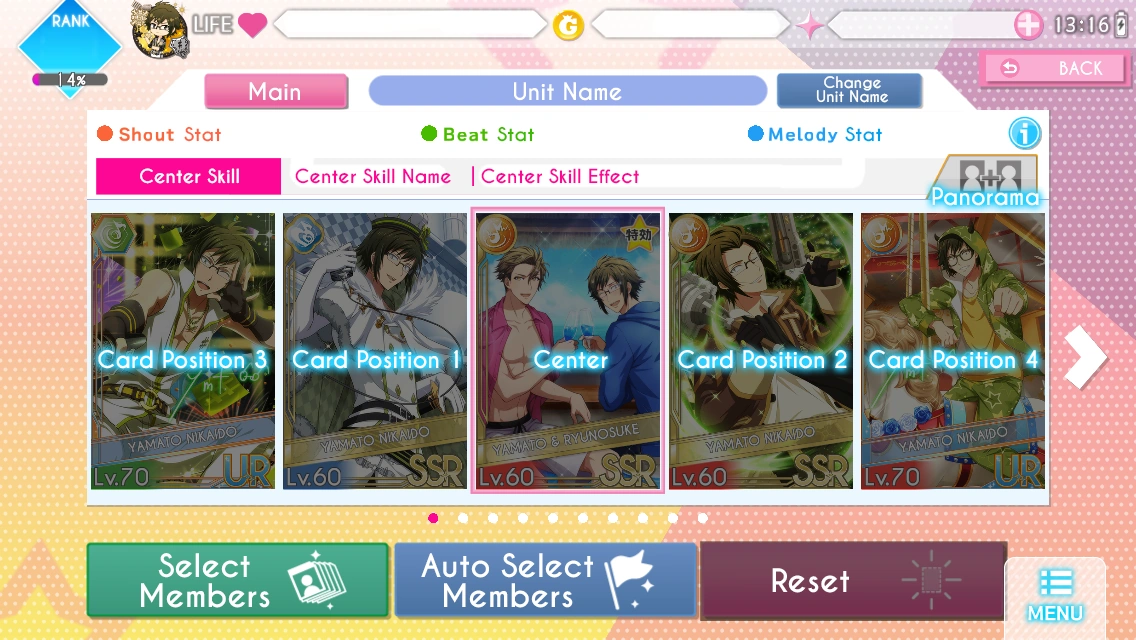
This is what you'll see when you press the Team button.
- If you tap a card on this screen, you will be able to change that card with another card in your Card List.
- If you hold a card on this screen, you will be able to view that cards information- Stats, Appeal Skill, Center Skill, etc. This interface is translated in another section.
- Also yes it is possible to have a full team of one card of the same character and the same character on one team.
As of Version 4.0.0, the amount of units you are allowed to have, have increased to tenn(10) from five(5). You cannot increase this number in any way.
|
|
Stuff at the top
- Main / Set as Main
- If this button is pink, that means that unit is selected as your main unit. If this button is blue, that means you can make that team your main unit. You can only have on Main Unit at a time.
- So to change your main unit, you have to go to a different team slot that's not your main unit and select that button where the button will be blue.
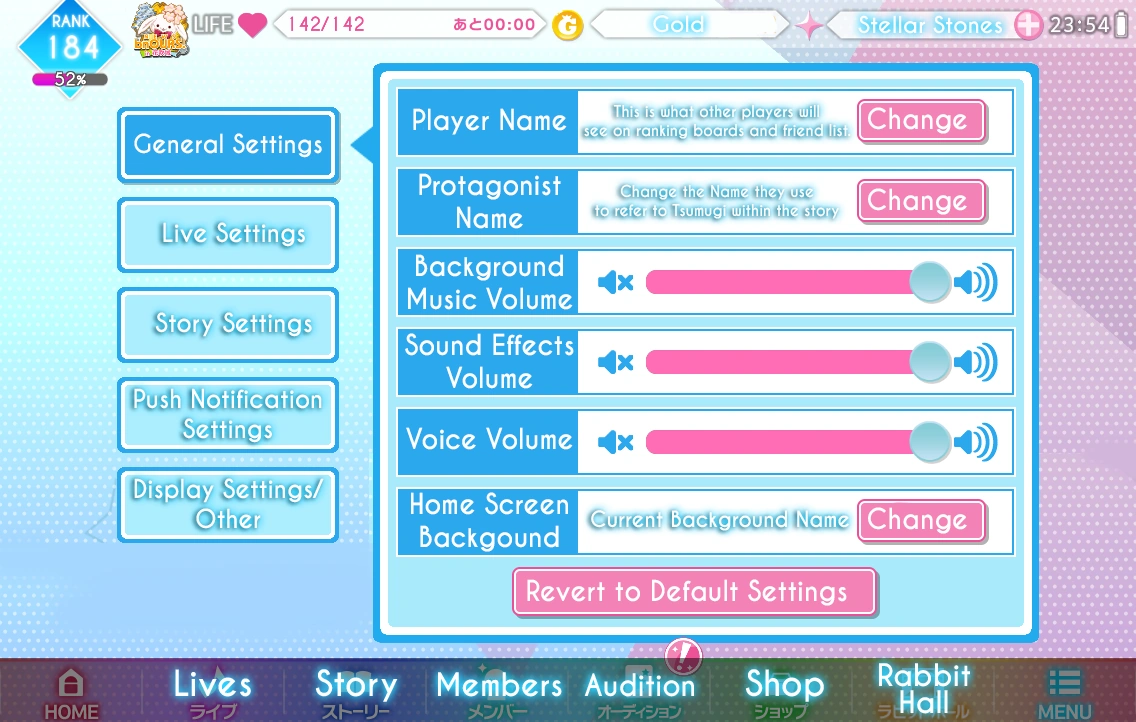
- Unit Name Change
- Self-explanatory. Pressing this button will allow you to change the name of that unit. Do keep in mind that there is a 15 character limit.
- Also, nobody will be able to view the name of your unit
- It's helpful to keep note of what you name your units as you can use this information to get your account back in the case if something happens to it.
- The Yellow Number Right Next to Attribute Stat
- That's the added bonus from Rabbit Note and any Brooch Skills your unit has
- Can also see that in full by pressing the i button
- The i Button Right Above the Panorama button
- Pretty sure that i stands for Information.
- This button will allow you to view the Rabbit Notes stats of all of the characters present on the unit and the information of any Brooch Skills if any of the cards on that team have a Brooch Skill
|
|
Stuff at the bottom
- Select Members
- This button will let you manually change the cards on the current unit you are on.
- Auto Select Members
- This button will automatically select your five strongest Shout, Beat, and Melody cards from the cards in your Card List- Stat wise. Higher number = Good.
- Reset
- Self-explanatory. This will delete the Unit you have selected. It takes off all of the current cards on that team.
- Do note that you won't be able to delete a unit if you have made that unit your Main Unit.
|
| Practicing
|
|
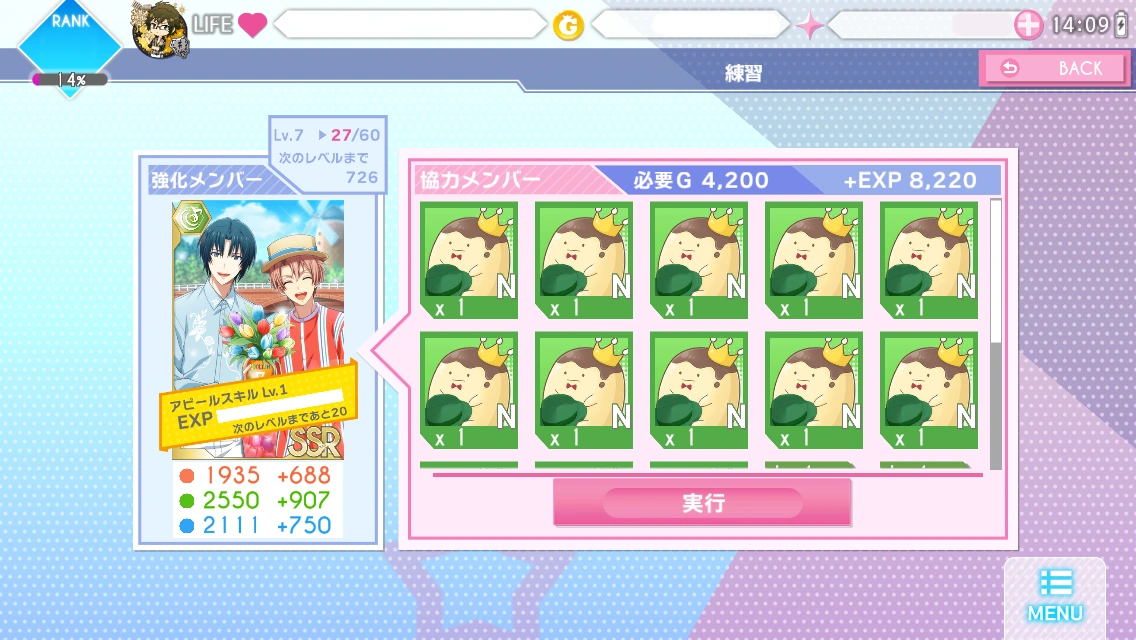
The Practice button is used to level up your cards with other cards.
- When you press it, you'll be taken to your Card List, pick the card you want to level up.
- Once you pick a card you want to level up, pick the cards you want to use to "feed" your main card by pressing any of the plus signs. You're only able to use a maximum of twenty(20) cards per "feed".
- If you use a duplicate(s) of any of the cards in that idolization line, the Main Card's Appeal Skill Experience will go up.
- If you use cards of the same attribute of the card you're leveling up, the experience gained will be higher than chosen cards that aren't the same attribute. So, it's recommended to choose cards of the same attribute as the one you're leveling up.
- If you have any puddings, you can view the amount of puddings you own by going into the pudding tab when you pick cards you want to level up, those are Experience cards. In other words, Max Leveling™ really fast. You can get these in a variety of ways, but the main way is from Events.
- If you ever obtain the SSR King Pudding that looks like a statue, save it. If used, the Main Card's Appeal Skill Experience will go up. These are really hard to come by, usually obtained via ranking in events. They're basically the only way to level up a card's appeal skill besides obtaining multiple copies of said card.
- On the right column of this screen where you are choosing cards to feed you will see three square, two of them are your good ol' pink and blue buttons and a green square.
- Green Square tells you how much Experience the card you're going to level up is going to get from the cards you've chosen.
- Pink button will reset the choices you've chosen.
- Blue button will confirm your choices if you've chosen anything. If you haven't chosen anything it'll take you back to the previous screen where you choose a card to level up.
- So, once you've chosen which cards you want to use as leveling cards to level up your main card, press the blue button.
- Those plus signs from earlier will now be filled with the cards you have chosen to feed. Above the card you want to level up you will see a square. This square tells you the level your card is going to be at on Base Success and how much experience it will take to level up to the next level.
- This process requires some amount of gold, so you will want to have met that required amount of gold.
- Also do note, that the cards you're going to use to level up the main card will be gone forever. So be careful on which cards you pick.
- Press the Pink button in the middle and your card you wanted to level up will be leveled up!
- Most of the time you'll get "Base Success" which is normal. But occasionally you'll get a "Great Success" or a "Brilliant Success" which raises the amount of Experience the card gets. "Great Success" will give 1.5 times more than base and "Brilliant Success" will give 2.0 times more than base.
- Why is there a Pudding on this button? it means the rate for Great Success and Brilliant Success are raised.
|
| Idolizing / Upgrading / Awakening
|
|
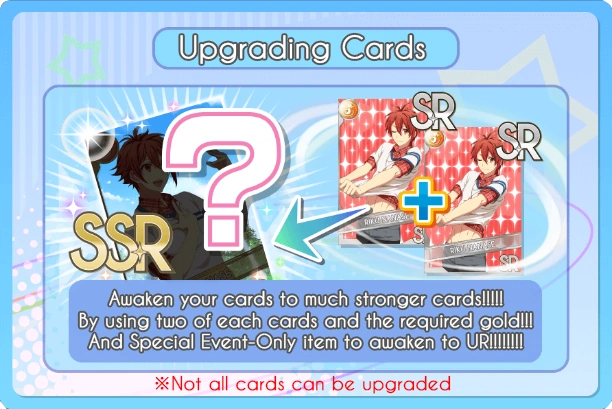
In this button, you're able to change the rarity of a card by upgrading it! Here are the current rarities from lowest to highest.
Normal (N) → Rare (R) → Star Rare (SR) → Super Star Rare (SSR) → Ultra Rare (UR)
The requirements to upgrade any cards from N to SSR are the following
- One exact duplicate of said card
- The cards don't need to be the same level
- Gold
- Amount varies on rarity you're upgrading to
If you're able to, it's recommended that you idolize your cards when they're both at level 1 with no special training done to any of them. URs are an exception to that special training part. The reason for this is because once you upgrade a card, the card's level will go back to being at level 1.
|
|
If you met the above requirements, here's how you idolize cards from N to SSR.
- When you press the Upgrade button, you'll be taken to your Card List, pick the card that you want to upgrade and have a second copy of.
- Once there, you will be given a screen of the card you're about to idolize and the duplicates of said card.
- Pick your other duplicate card
- Do note, that the cards you're going to use to idolize your main card will disappear as it has been used. So be careful on which cards you pick.
- If you're unable to pick the duplicate, it's because of one of two reasons. 1) The card is Favorited. Unfavorited it. or 2) The card is in a team. Take the card off that team.
- Press the Pink button in the middle and your card you wanted to idolize will be idolized!
|
| How to Awaken SSRs to URs / UR Information
|
|
URs were implemented into IDOLiSH7 in Version 2.0.0, the one year anniversary update on August 24, 2016.
|
|
For the sake of this guide, there are going to be two categories of URs. Those that can be scouted with the normal rates being 2% if they are even available to scout. And those that you have to idolize in order to get. The ones where you idolize in order to get cannot be scouted- only their lower rarity version can be scouted.
|
|
The following URs are only available though scouting
Last updated: August 25, 2019
|
|
The following URs are only available though idolizing
Last updated: August 25, 2019
|
|
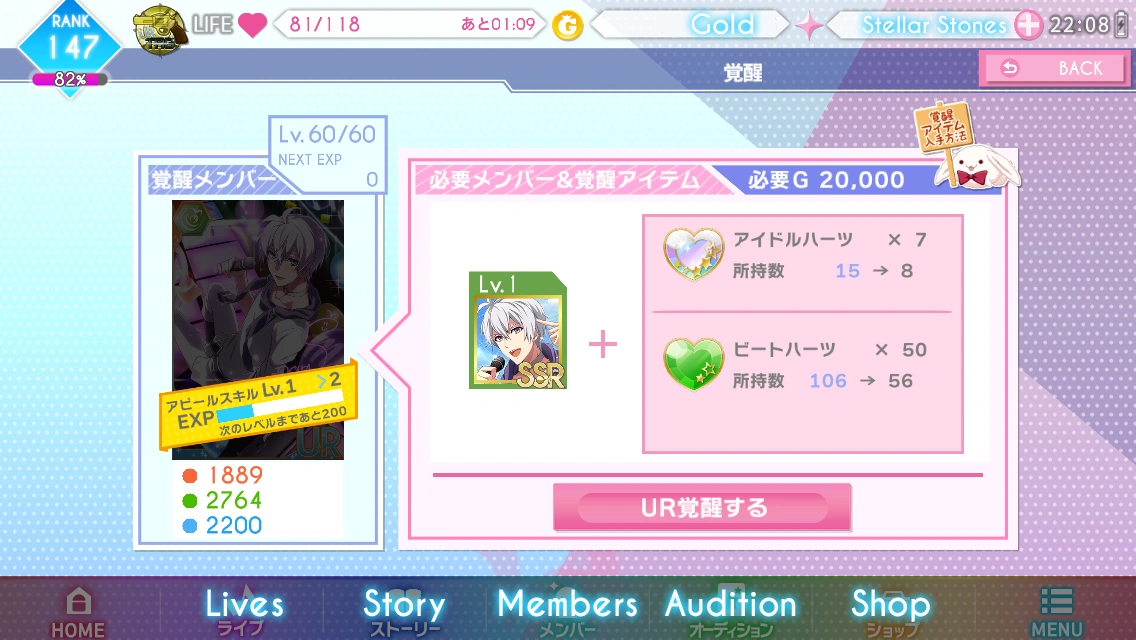
URs can be idolized from two copies of SSRs. Unlike the regular method of idolizing, idolizing SSRs into URs have more requirements.
- Must have two copies of the SSR card
- One card needs to be fully special trained
- Must obtain 50 Attribute Hearts that matches the attribute of your SSR
- Must obtain Idol Hearts. 7 Idol Hearts are needed to awaken.
- 20,000 Gold
|
|
First off, only one copy needs to be fully special trained. All Special Training slots of the card must be filled up completely. If you don’t know how many tokens it takes to fully train an SSR,
- R-based SSRs (R > SR > SSR) = 6 bronze tokens
- SR-based SSRs (SR > SSR) = 18 bronze tokens, 12 silver tokens
- Pure SSRs (SSR only) = 45 bronze tokens, 27 silver tokens, 18 gold tokens
No copies need to be at max level in order to idolize.
|
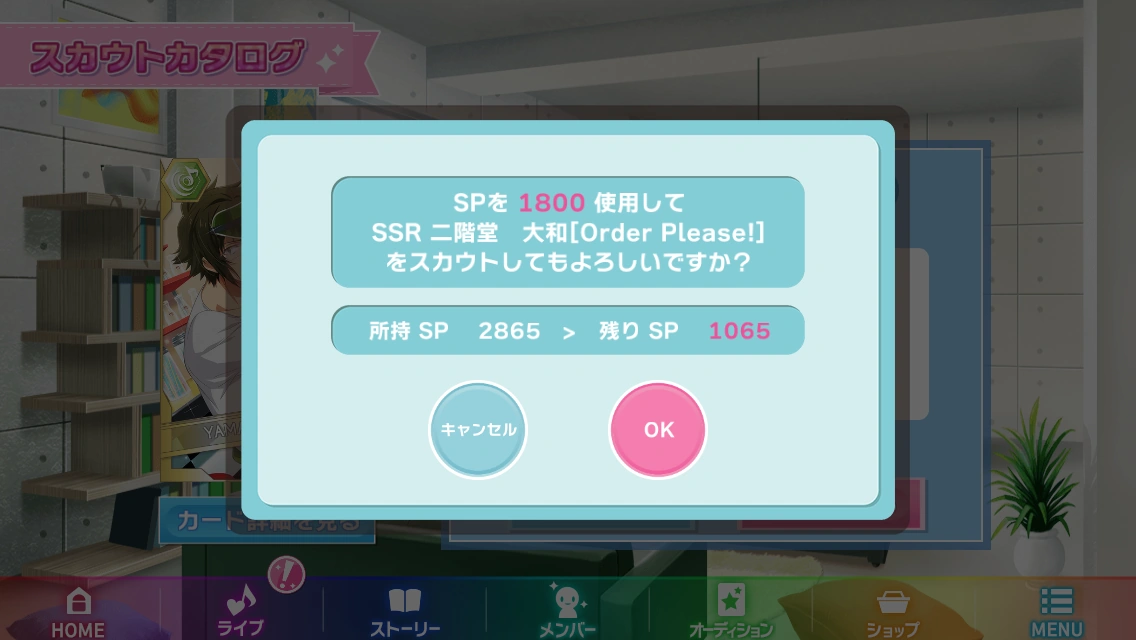
|
Second off, your other copy that's not special trained, must not be in a team, and it must not be locked. If you don’t have a second copy, you will either have to spend SP for it (during Pick-Up, the cost is 1800 SP; if not, the cost is 2000 SP) or get lucky when you scout in the Rare Audition with rate ups.
|
|
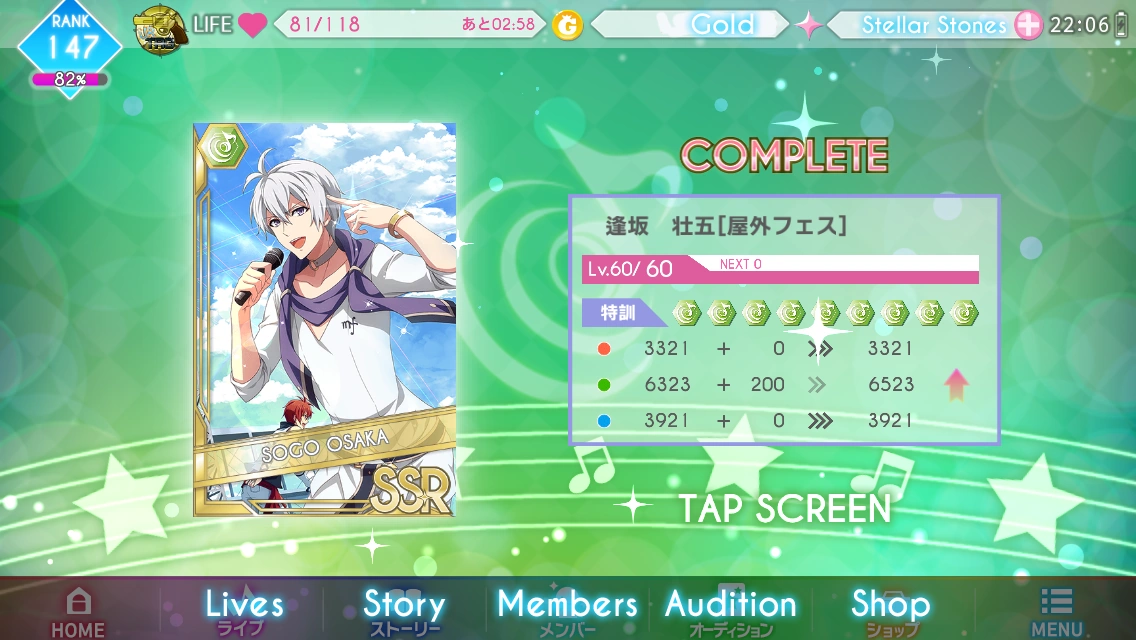
Having a fully trained card + a second copy of the same SSR will allow you to idolize, but not before you obtain the necessary "hearts".
In this example, Sogo Osaka (Outdoor Festival) is a Beat card, so in order to idolize him into a UR, you must obtain 50 Beat Hearts and 7 Idol hearts.
|
|
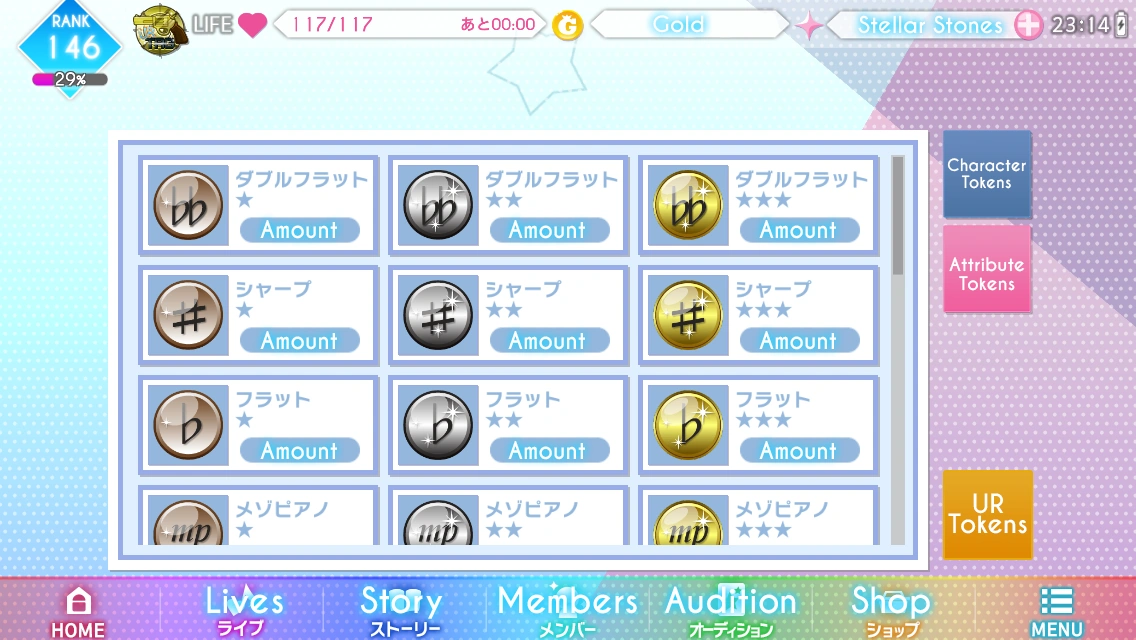
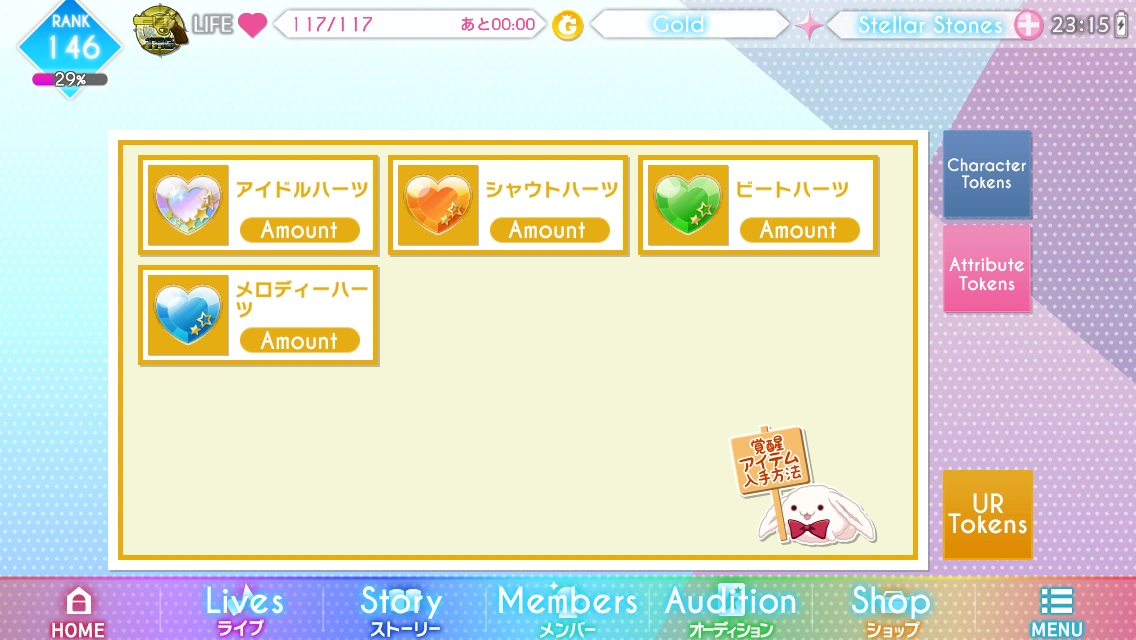
"Attribute Hearts" are exactly what they sound: heart-like jewels that have to match with the attribute of your card. They are similar to the "souls" in special training. They look like theses!
- Shout Heart:
- Beat Heart:
- Melody Heart:
"Idol Hearts" are the other item needed to idolize an SSR. Idol Hearts can be used for any idol and are not character specific. However, they are much rarer compared to the Attribute Hearts. 7 Idol Hearts are needed to idolize an SSR. It looks like this!
- Idol Hearts:
Currently as of August 25, 2019, the only way to obtain Attribute and Idol Hearts is to obtain from events through Clearing House or Point Reward.
|
|
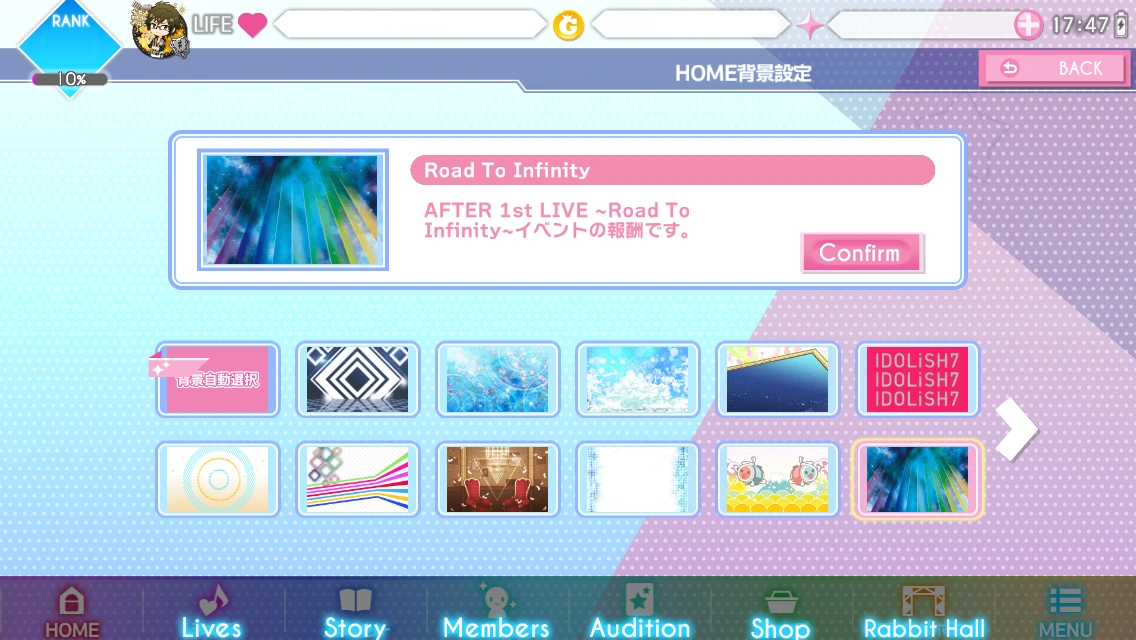
Once you idolize your cards into a UR, the Home Screen will change into a set background exclusive to that UR if you have the Automatic Background Selection (背景自動選択) background set. There will also be nice sparkles on the UR icon when it appears in your member list or on your friend list. Also you gain some amount of bragging rights. The process is very well worth it!
|
|
| Special Training
|
|
Once you unlock chapter 8 in the main story, not only can you start playing the daily lessons but you can start special training your cards! This means that you can essentially train your card’s main attribute stat past its level 60 max! For example, Sogo Osaka (Outdoor Festival) has a max Beat stat of 4,723 at level 60. However, with special training you can add 1,800 to that Beat attribute and actually raise it to 6,523!
|
|
However, how much you’re able to special train a card depends on its BASE RARITY.
- Cards with an R base (R > SR > SSR) only have three slots
- Cards with an SR bases (SR > SSR), have six slots
- 18 bronze tokens, 12 silver tokens
- Pure SSRs (SSR Only) have the full nine slots.
- 45 bronze tokens, 27 silver tokens, 18 gold tokens
|
| How to obtain Souls and Tokens
|
|
You can get these a few ways
- One way is to do it via Daily Lessons button found on the home screen. Can view a guide on that in full detail in the Home Screen section of this guide.
- The other way is to gain them through events as point rewards, clearing prizes and ranking rewards.
|
|
For this guide, we'll be using Daily Lessons as that is open at all times. Here is The schedule for daily lessons:
- Monday - Friend Lessons (Increased Friend Points)
- Tuesday - Shout Lessons (Increased chances of getting Shout attribute souls)
- Wednesday - Melody Lessons (Increased chances of getting Melody attribute souls)
- Thursday - Beat Lessons (Increased chances of getting Beat attribute souls)
- Friday - Stamina Lessons (Increased EXP earned)
- Saturday - Gold Lessons (Increased Gold drop
- Sunday - Special Lessons (Everything above, but you get to choose. They are in the same order as the days which means the first one you see is for Friend Lessons and so on)
I’ve underlined plus bolded the ones you need to remember for Special Training! This is because not only do attribute souls drop but character tokens too!
|
|
Character tokens are slightly different as they have the music symbol of that character on them. The information for everyone's music symbols are found on their specific character pages! You will only earn tokens for the character you have as your center!! Meaning that if you play a song with a team (any team, it does not have to be your main team) that has a Yamato center then you will have a chance to earn ONLY sharp (♯) tokens. The types of tokens are dependent on the difficulty level for the song you play:
- Easy/Normal: Bronze tokens
- Hard: Silver and Bronze tokens
- Expert: Gold, Silver, and Bronze tokens
|
|
Like so! Sadly, character tokens are not always guaranteed. There’s been a lot of theories, speculations, and jinxes about how to increase the drop rate of the character tokens, but so far nothing has been confirmed and everything is all lucked based.
|
|
| How to Special Train Your Cards
|
- Press the green button on the member page, in the guide it's title Special Training
- Pick the card you want to special train, this page will only show the cards in your Card List.
- Make sure you meet the requirements for at least one level
- Press the pink button in the middle
- Congratulations you have successfully special trained a card by one level!
- If you fully special train a card, the border will change as shown above!
|
|
| Locked Thing That Says ブロー
|
|
It's locked, I don't know what it is www. Maybe something related to Brooch(ブローチ) feature on cards? Like leveling up that skill? That'd make those URs more overpowered than they already are www. Anyways, this section of the guide will be updated whenever that gets unlocked.
|
| Rabbit Notebook
|
|
The Rabbit Notebook (Rabbit Note for short) is a feature introduced in Version 3.0.0 that allows players to slightly increase the stats of individual characters and unlock character themed items, such as a Home Screen wallpaper.
|
|
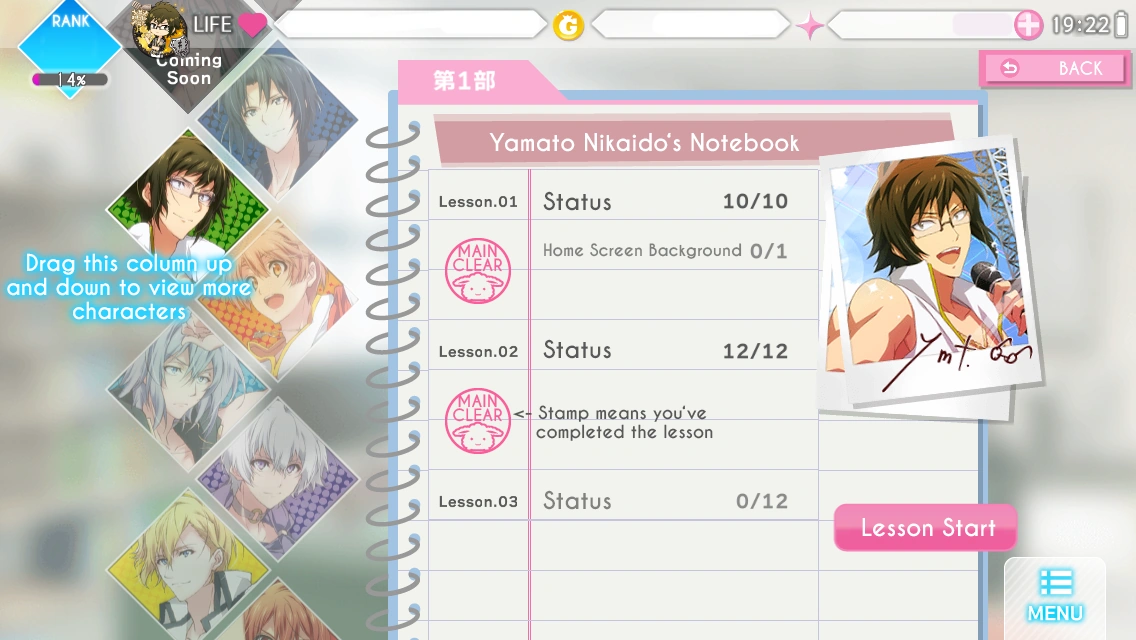
This is what you'll see when you press the Member button.
- Drag the Character section up and down to view more characters
- Tap on a character to view their Rabbit Note status.
- Press Lesson Start(レッスンをはじめる) to go to the character selected's notebook entry.
|
|
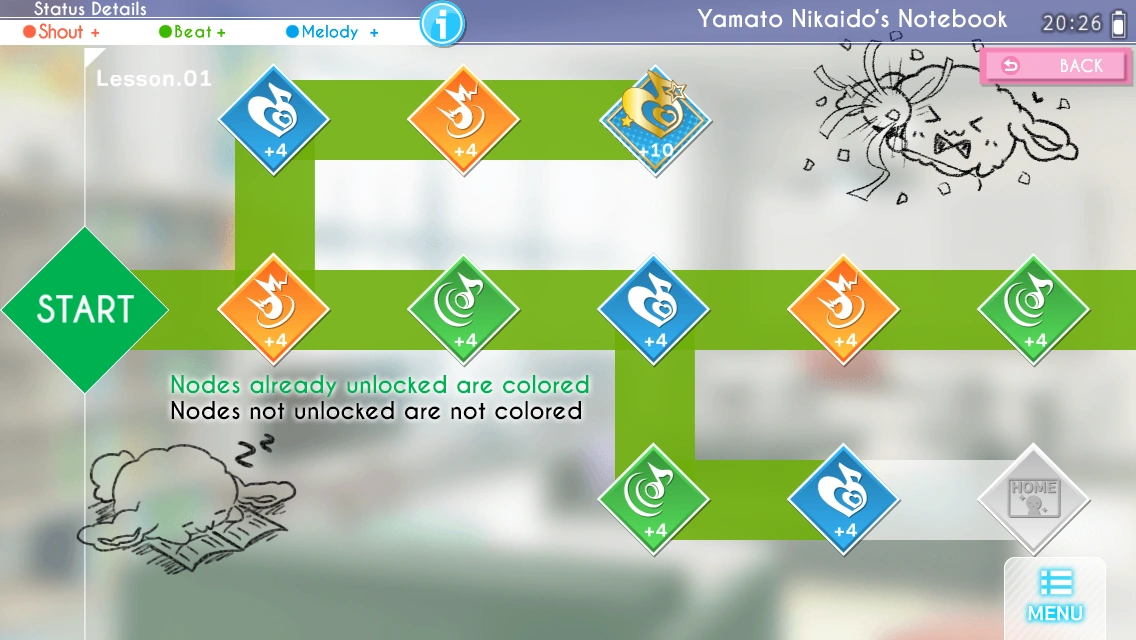
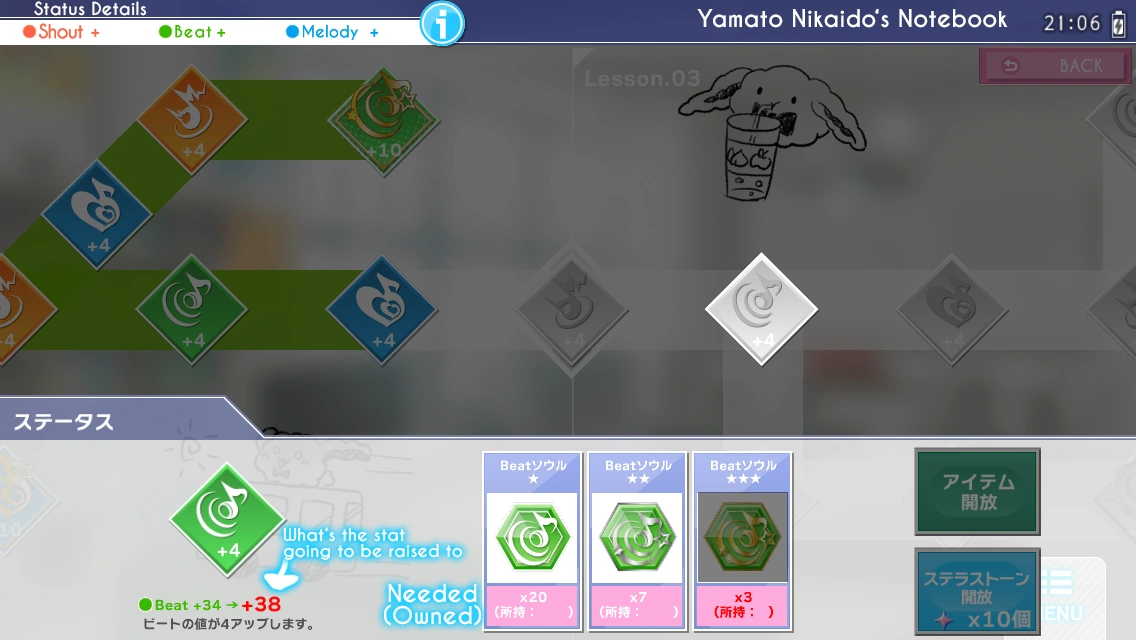
Here, you'll be able to see an overview of the full lesson, including what stat boosts or items you can get.
- Drag your finger across the screen starting from the right and ending on the left to see future lessons.
- Eventually, you will run across an arrow that says "Coming Soon" leading into the next lesson. This means, Rabbit Note will be updated with new nodes periodically. Schedule of when is not given.
- Pressing the (i) symbol will give you a total of all the stat boosts you get from Rabbit Note of that character.
|
- Selecting a node...
- ...You have already unlocked will give you the requirements for unlocking the node and a Kinako Stamp signaling you've already unlocked it.
- ...You haven't unlocked will give you the requirements for unlocking the node and a button to unlock it. You can either fufill the requirements for unlocking it, or use 10 Stellar Stones to instantly unlock it.
- You won't be able to use Stellar Stones for nodes at the end of something like a branch or the last node in the lesson.
- If a requirement is greyed out, it means you haven't fulfilled the required amount of that item.
And that's all that happens in this screen.
|
|
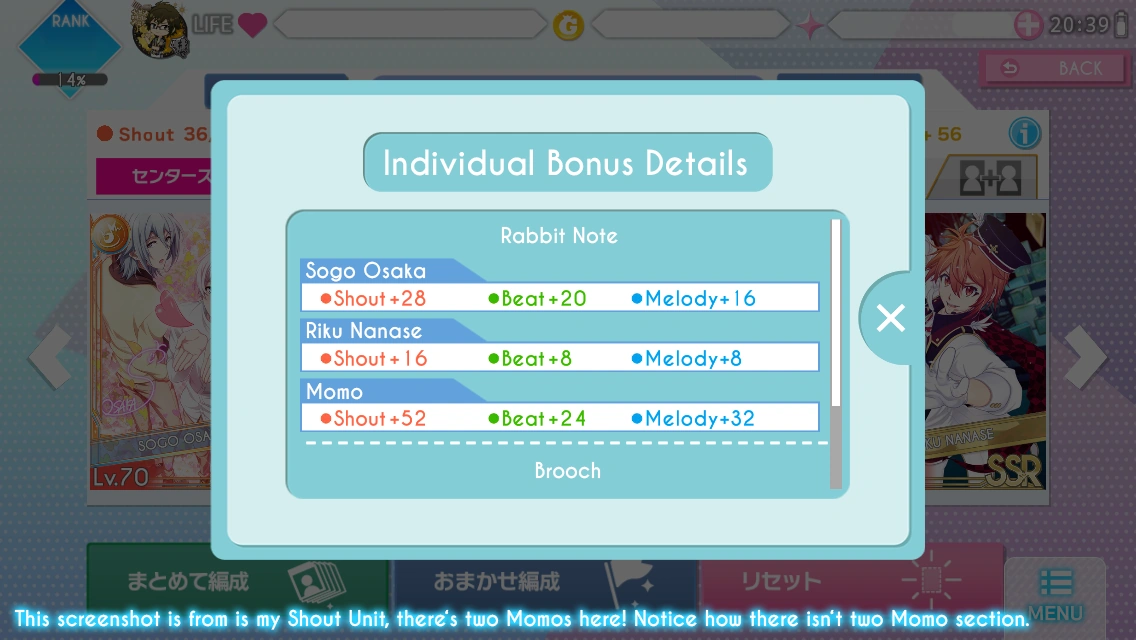
As long as you've unlocked at least one node in a character's note book entry and said character is in any position on your unit, the stats boost you've gotten from Rabbit Note will be applied to your unit. You can view the bonuses being applied by pressing the i symbol of that unit.
- Having multiple cards of the same character in a unit will not effect the stat bonus. It is only applied once to your Unit.
- If you train another character and add that character onto your unit, their rabbit note boost will be applied.
- So basically, If I have two Yamato cards on a unit- it will only apply Yamato's Rabbit Note bonus once. But if I have Yamato and another character that's not Yamato on a unit, it will apply Yamato and that other character Rabbit Note bonus once.
|
|
|
| Card List / Selling Cards
|
|
This is what you'll see when you press the Card List button.
- Self explanatory, it's a list of all of the cards you own.
- This is where all cards you get from Gacha, Scout Catalog, Nanakores, and etc. go.
- Cards have to be here in order to do anything really.
- Can increase Max Member space using three(3) Stellar Stones for three space.
- Pudding Tab has no limit as of Version 3.6.0.
- Background context: Before Version 3.6.0, Puddings were in the Idol Tab. There was no separate Pudding Tab like there is now. They shared and took up space in the Idol Tab. Fun part is that you were able put them on your team and home screen. If you still own Puddings from before Version 3.6.0 and haven't used any of them, where they're now treated as items, you're still able to put them on your team and home screen. However if used they will disappear.
|
|
To send a card to the Waiting Room / Card List
- Press orange button. This is labeled as "Send to Waiting Room" on the Card List screen or "Send to Card List" on the Waiting Room screen in the Master Guide
- Select the cards you want to send to either of the places.
- You can only send 100 cards at a time both ways.
- On the right column of this screen where you are choosing cards to sell you will see two square, both of them are your good ol' pink and blue buttons.
- Pink button will reset the choices you've chosen.
- Blue button will confirm your choices if you've chosen anything. If you haven't chosen anything it'll tell you to choose stuff.
- So, once you've chosen which cards you want to move, press the blue button.
- You'll be prompted with a window saying "the following cards are going to be moved to XXX, you ok with it?". Pink button means yes and blue button means no.
- Pressing the pink button will send your cards to wherever you wanted to send it and the blue button will take you back to the selecting cards to move screen.
|
| Selling Cards
|
|
If you wanted to sell a card, press the sell button.
- You cannot sell cards in teams or that are favorite locked.
- You can only sell 50 cards at a time.
- What you get from a card after selling varies on rarity and if it's at max leveled or not.
- Selling a UR at max level will give you
- 42,900 Gold
- 30 Scout Points
- Selling a UR not at max level will give you
- 1,500 Gold
- 10 Scout Points
- Selling a SSR at max level will give you
- 24,600 Gold
- 5 Scout Points
- Selling a SSR not at max level will give you
- 1,000 Gold
- 1 Scout Points
- Selling a SR at max level will give you
- Selling a SR not at max level will give you
- Selling a R at max level will give you
- Selling a R not at max level will give you
- Selling a N at max level will give you
- Selling a N not at max level will give you
- On the right column of this screen where you are choosing cards to sell you will see three square, two of them are your good ol' pink and blue buttons and a green square.
- Green Square tells you how much gold you're going to get from the cards you've chosen.
- Pink button will reset the choices you've chosen.
- Blue button will confirm your choices if you've chosen anything. If you haven't chosen anything it'll tell you to choose stuff.
- Also do note, that the cards you're going to sell will be gone forever. So be careful on which cards you pick.
- So, once you've chosen which cards you want to sell, press the blue button.
- If you're selling an SR or higher rarity, you'll be given a screen basically saying "Hold up! You're going to be selling cards SR or higher rarity, you sure you want to do that?" Pink button means yes and blue button means no.
- If you pressed pink, you will be given a screen that tells you how many cards you're going to sell, the amount of gold you're going to be given, and the amount of sp if you're selling any SSRs or URs.
- Pressing the pink button will sell the cards and the blue button will take you back to the selecting cards to sell screen.
|
|
| Waiting Room
|
|
Waiting Room is a feature added in the Version 3.2.0 Update.
This is what you'll see when you press the Waiting Room button.
- Self explanatory, it's a list of all of the cards you own. Except unlike the Card List, this is essentially a storage for cards.
- Cards in the Waiting Room cannot be:
- Put into a Unit
- Practiced
- Upgraded / Idolized
- Special Trained
- Set to the Home Screen
- Can increase Max Member space using three(3) Stellar Stones for three space.
|
|
To send a card to the Waiting Room / Card List
- Press orange button. This is labeled as "Send to Waiting Room" on the Card List screen or "Send to Card List" on the Waiting Room screen in the Master Guide
- Select the cards you want to send to either of the places.
- You can only send 100 cards at a time both ways.
- On the right column of this screen where you are choosing cards to sell you will see two square, both of them are your good ol' pink and blue buttons.
- Pink button will reset the choices you've chosen.
- Blue button will confirm your choices if you've chosen anything. If you haven't chosen anything it'll tell you to choose stuff.
- So, once you've chosen which cards you want to move, press the blue button.
- You'll be prompted with a window saying "the following cards are going to be moved to XXX, you ok with it?". Pink button means yes and blue button means no.
- Pressing the pink button will send your cards to wherever you wanted to send it and the blue button will take you back to the selecting cards to move screen.
|
|


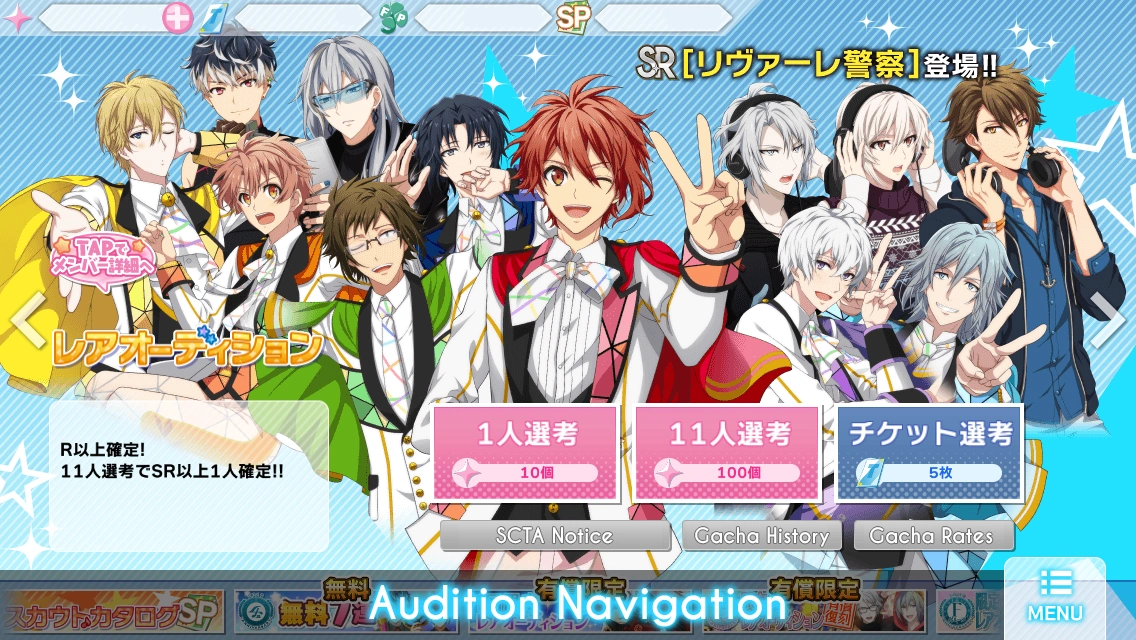
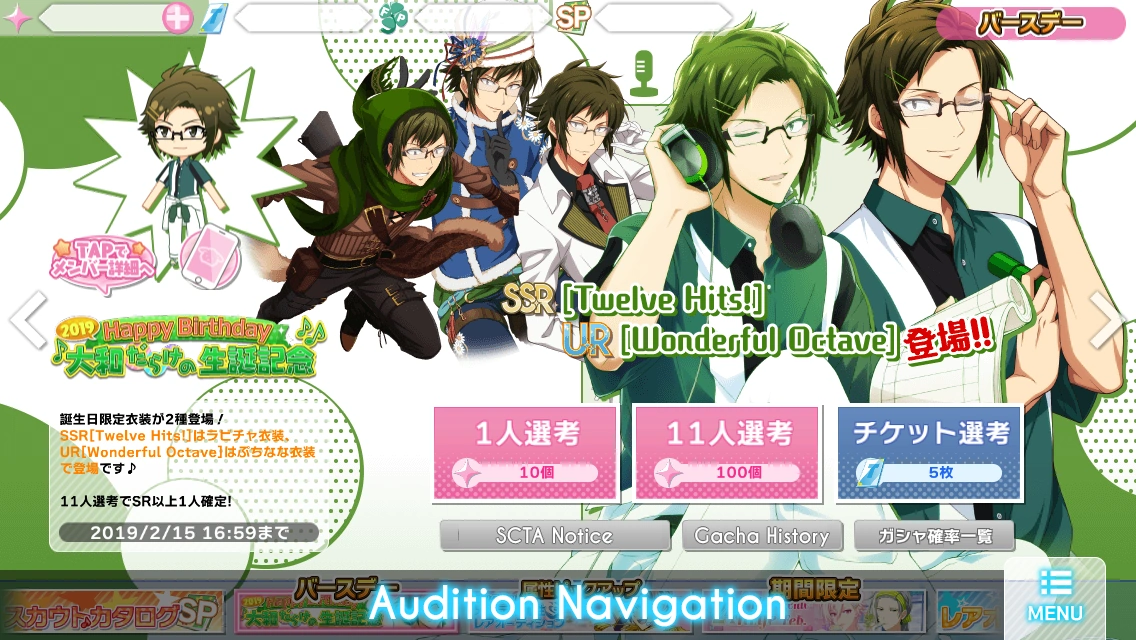
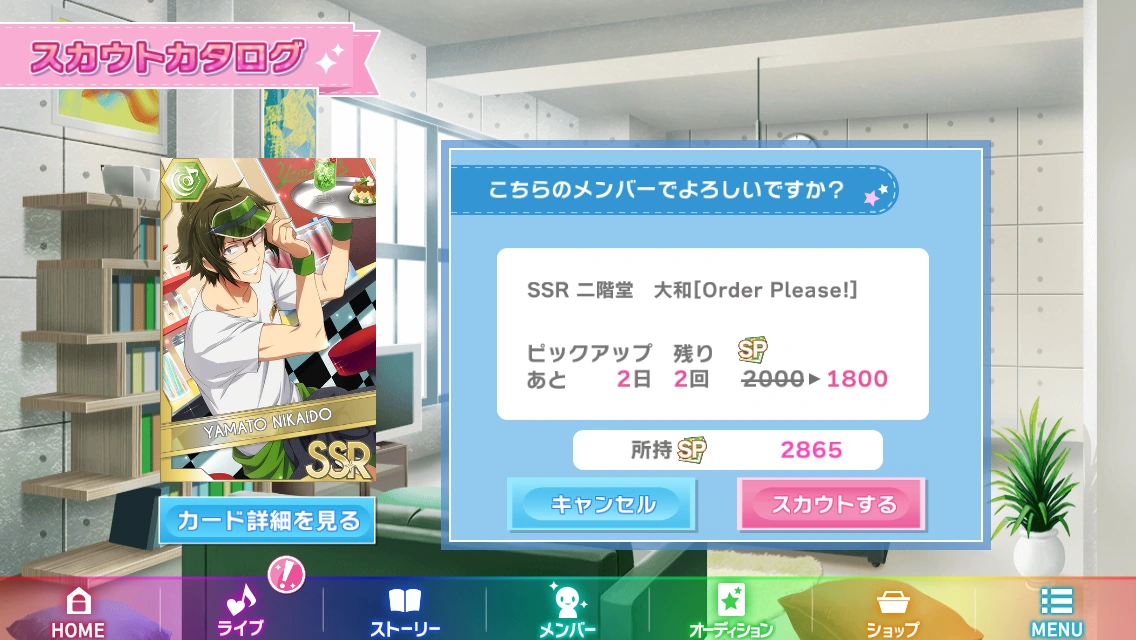
 An example of all three buttons
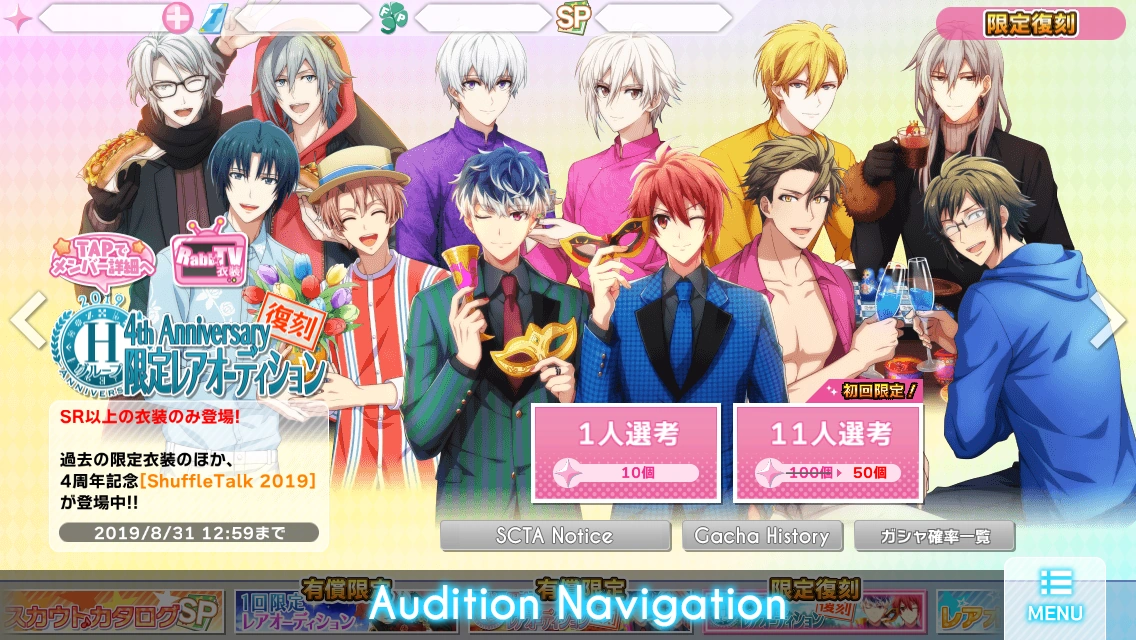
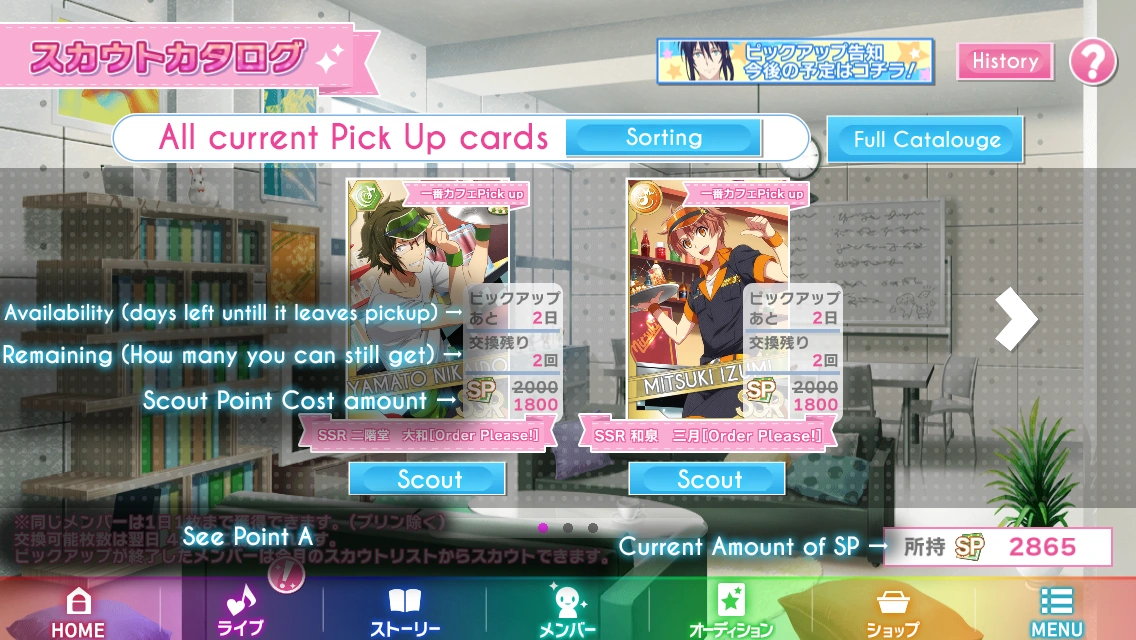
 An example of a discount button


